This is the multi-page printable view of this section.
Click here to print.
Return to the regular view of this page.
General operational guidelines
General operational guidelines
This section includes general-purpose guidelines for the operation of Aura that are transversal to different Aura components
Index
1 - Operational flowcharts
Aura operational flowcharts
The current section includes certain key operational flows in Aura
Introduction
Find the following flowcharts for Aura operational processes:
1.1 - Direct Line flowcharts
Direct Line flowcharts
Request a new accessToken from Direct Line to access Aura
These steps must be executed before starting the user conversation with Aura. The token to access Direct Line must be requested to Aura because one of the admin secrets of the bot Direct Line configuration is used to generate the tokens.
@startuml
    title: Request a DirectLine accessToken for AuraGroot
    participant Channel #bdf492
    participant DirectLine #FFCC99
    participant DirectLineWebsocket #FFCC99
    participant AuthenticationApi #FFFF99

    Channel -> AuthenticationApi: POST /aura-services/v1/token/wss
    AuthenticationApi -> DirectLine: POST /token
    DirectLine -> AuthenticationApi: 201 Created {token}
    AuthenticationApi -> Channel: 201 Created {token}
    Channel -> DirectLine: Open WebSocket
    Channel -> DirectLine: Start sending user requests
    Channel -> DirectLineWebSocket: Start getting Aura responses
@enduml
New Direct Line message from anonymous users
An anonymous user is the one that has never been authenticated via Kernel and her authentication session has not been stored in aura-authentication-api.
Find more information in the document Channels authentication: anonymous users
@startuml

title: Basic flow for DirectLine anonymous users


    actor User
    participant Channel #bdf492
    participant DirectLine #FFCC99
    participant DirectLineWebsocket #FFCC99
    participant AuthenticationApi #FFFF99
    participant AuraGroot #76bbe7
    participant AuraBot #41a0f9

    Channel -> DirectLineWebsocket: Open WebSocket
    User -> Channel: Send [message]
    Note over Channel,DirectLine: The previously created token of DirectLine must be sent in the Authorization header as Bearer token.
    Channel -> DirectLine: Send {activity[message]}
    DirectLine -> AuraGroot: Send {activity[message]}
    AuraGroot -> DirectLine: 200 OK
    note right of AuraGroot: KPI entities are stored during Middlewares execution in local memory.\nEvery 2 minutes and before closing a POD, they are written in Azure Storage.
    AuraGroot -> AuraGroot: Middlewares
    AuraGroot -> AuraGroot: Recognizers (GetSkillByChannel)
    AuraGroot -> AuraBot: Send {activity[message]}
    Note over AuraGroot,AuraBot: There are two different conversations: one between the channel and AuraGroot and another one between AuraGroot and the skill.
    AuraBot -> AuraGroot: 200 OK
    AuraBot -> AuthenticationApi: GET AuraId
    AuthenticationApi -> AuraBot: 404 Not found (Anonymous)
    AuraBot -> AuraBot: Middlewares
    note right of AuraBot: KPI entities are stored during Middlewares execution in local memory.\nEvery 2 minutes and before closing a POD, they are written in Azure Storage.
    AuraBot -> AuraBot: Recognizers
    AuraBot -> AuraBot: Main Dialog
    AuraBot -> AuraBot: Execute Specific functional Dialog
    AuraBot -> AuraGroot: Send {responseActivity}
    AuraGroot -> AuraBot: 200 OK
    AuraGroot -> DirectLine: Send {responseActivity}
    DirectLine -> AuraGroot: 200 OK
    Channel -> DirectLineWebsocket: Read {responseActivity}
    Channel -> User: Show {responseActivity}
@enduml
New Direct Line message from authenticated users
Find information regarding users’ authentication in the document Channels authentication: authenticated users.
@startuml

title: Basic flow for DirectLine authenticated users

    actor User
    participant Channel #bdf492
    participant DirectLine #FFCC99
    participant DirectLineWebsocket #FFCC99
    participant AuthenticationApi #FFFF99
    participant AuraGroot #76bbe7
    participant AuraBot #41a0f9
    participant KernelAuthServer #99FFFF
    participant KernelUserProfileApi #99FFFF

    Channel -> DirectLineWebsocket: Open WebSocket
    User -> Channel: Send [message]
    Note over Channel,DirectLine: The previously created token of DirectLine must be sent in the Authorization header as Bearer token.
    Channel -> DirectLine: Send {activity[message]}
    DirectLine -> AuraGroot: Send {activity[message]}
    AuraGroot -> DirectLine: 200 OK
    Note right of AuraGroot: KPI entities are stored during Middlewares execution in local memory.\nEvery 2 minutes and before closing a POD, they are written in Azure Storage.
    AuraGroot -> AuraGroot: Middlewares
    AuraGroot -> AuraGroot: Recognizers (GetSkillByChannel)
    AuraGroot -> AuraBot: Send {activity[message]}
    Note over AuraGroot,AuraBot: There are two different conversations: one between the channel\nand AuraGroot and another one between AuraGroot and the skill.
    AuraBot -> AuraGroot: 200 OK
    opt user is not in cache
        AuraBot -> AuthenticationApi: GET AuraId
        AuthenticationApi -> AuraBot: 200 OK {userData}
        AuraBot -> KernelAuthServer: POST /token
        Note over AuraBot,KernelAuthServer: Here, a 3legged accessToken is requested
        KernelAuthServer -> AuraBot: {token}
        AuraBot -> KernelAuthServer: getIntrospect(token)
        opt channel allows UserProfile
            AuraBot -> KernelUserProfileApi: getUserProfile(userId)
            KernelUserProfileApi -> AuraBot: UserProfile
        end
        AuraBot -> AuraBot: store user in cache: userData, userProfile, valid scopes and purposes
    end
    AuraBot -> AuraBot: Middlewares
    Note right of AuraBot: KPI entities are stored during Middlewares execution in local memory.\nEvery 2 minutes and before closing a POD, they are written in Azure Storage.
    AuraBot -> AuraBot: Recognizers
    AuraBot -> AuraBot: Main Dialog
    AuraBot -> AuraBot: ValidateAuthenticationForDialog
    AuraBot -> AuraBot: Execute Specific functional Dialog
    AuraBot -> AuraGroot: Send {responseActivity}
    AuraGroot -> AuraBot: 200 OK
    AuraGroot -> DirectLine: Send {responseActivity}
    DirectLine -> AuraGroot: 200 OK
    Channel -> DirectLineWebsocket: Read {responseActivity}
    Channel -> User: Show {responseActivity}
@enduml
1.2 - User authentication flowcharts
User authentication
Basic flows for users authentication in Aura
Non-integrated channels
For this kind of channels, the users always start as authenticated. The channel is responsible for authenticating the user in the OB and Kernel and for generating the auraId needed to prepare a valid request to Aura.
Further information about non-integrated channels can be found in Channels Authentication: non-integrated authentication.
This diagram must be executed just before sending messages to Aura for authenticated users.
⚠️ The request from Channel to IDP is not fully explained in the diagram. Follow Kernel documentation for a deep dive on how it works.
@startuml
title: Users authentication flow for non-integrated channels

    participant Channel #bdf492
    participant AuthenticationApi #FFFF99
    participant IdP #99FFFF
    participant KernelAuthServer #99FFFF
    participant KernelAuraServicesApi #99FFFF

    Channel -> IdP: POST /authorize
    IdP -> Channel: 200 OK {UserAuthenticationContext}
    Channel -> KernelAuthServer: POST /token
    Note over Channel,KernelAuthServer: Here a 3-legged accessToken is requested
    KernelAuthServer -> Channel: {token}
    Channel -> KernelAuraServicesApi: GET /users/aura-id
    KernelAuraServicesApi -> AuthenticationApi: GET /aura-services/v1/users/aura-id
    AuthenticationApi -> KernelAuraServicesApi: 200 OK {AuraUser}
    KernelAuraServicesApi -> Channel: 200 OK {AuraUser}
    Note over KernelAuraServicesApi,Channel: AuraUser contains the auraId needed to fulfil the requests to Aura.
@enduml
Integrated or federated channels
For this kind of channels, the users always start as anonymous and they can consume some generic questions use cases, those that do not need knowing who the user is to be resolved, such as FAQs or small talk use cases.
Once the user requests one use case that needs knowing her identity, then the authentication flow is launched by a dialog available in aura-bot. The auraId, in this case, is decided by the channel. Usually, its own user identifier is used. For instance, in the case of WhatsApp or Facebook, their own users identifier are received and used as auraId.
Further information about integrated channels can be found in Channels Authentication: integrated authentication.
This diagram substitutes the Specific functional Dialog step in the diagram New Direct Line message from anonymous user, assuming that the user has requested an authenticated use case. Not all the steps of this diagram have been included again in the sake of clarity of the diagram.
User authentication by redirection
Find further details about how this mechanism works in Kernel here.
@startuml
title: Users authentication flow for integrated channels with URL redirection

    participant AuthenticationApi #FFFF99
    participant AuraGroot #76bbe7
    participant AuraBot #41a0f9
    participant AuraBridge #1add4d
    participant IdP #99FFFF
    participant KernelAuthServer #99FFFF
    participant KernelUserProfileApi #99FFFF

    AuraBot -> AuraBot: Executing a user message that raises a dialog that needs authentication
    AuraBot -> AuraBot: Main Dialog
    AuraBot -> AuraBot: ValidateAuthenticationForDialog
    AuraBot -> AuraBot: AuthenticationDialog
    AuraBot -> IdP: OPEN in webserver /authorize?state&redirectUri
    Note over AuraBot,IdP: At this moment, a web page with the login form is open
    IdP -> KernelAuthServer: Authentication status
    Note over KernelAuthServer,AuthenticationApi: In Aura, the redirectUri points to our AuthenticationApi
    KernelAuthServer -> AuthenticationApi: POST /aura-services/v1/users/auraid/integrated?code&state
    AuthenticationApi -> AuthenticationApi: validate(state)
    AuthenticationApi -> KernelAuthServer: POST /token {code}
    KernelAuthServer -> AuthenticationApi: 200 OK {token}
    AuthenticationApi -> KernelAuthServer: POST /introspect {token}
    KernelAuthServer -> AuthenticationApi: 200 OK {plainToken}
    AuthenticationApi -> AuthenticationApi: store(AuraUser)
    AuthenticationApi -> KernelAuthServer: 200 OK
    AuthenticationApi -> AuraBridge: sendAsyncCallback(AuraUser)
    AuraBridge -> AuraGroot: Send {UserCreatedActivity}
    AuraBridge -> AuthenticationApi: 200 OK
    AuraGroot -> AuraGroot: Middlewares
    AuraGroot -> AuraGroot: Recognizers (GetSkillByChannel)
    AuraGroot -> AuraBot: Send {UserCreatedActivity}
    AuraBot -> AuraGroot: 200 OK
    AuraBot -> AuraBot: Middlewares
    Note right of AuraBot: KPI entities are stored during Middlewares execution in local memory.\nEvery 2 minutes and before closing a POD, they are written in Azure Storage.
    AuraBot -> AuraBot: Recognizers
    AuraBot -> AuraBot: Main Dialog
    AuraBot -> AuraBot: ValidateAuthenticationForDialog
    AuraBot -> AuraBot: Execute Specific functional Dialog
    AuraBot -> AuraGroot: Send {responseActivity}
    AuraGroot -> AuraBot: 200 OK
User authentication using WhatsApp
Access these documents for further detail:
1.3 - Use cases flowcharts
Use cases flowcharts
Key operational flowcharts for different types of use cases such as TV, generic questions, etc.
Message generic questions use case
Generic questions use cases are based on frequently asked questions (FAQs).
These experiences are valid for anonymous users, so the example is provided with an anonymous user, but are also valid for authenticated users, in this case, when entering aura-bot the authentication steps should be executed.
Please, refer to Direct Line basic flows for authenticated users to check the differences. The example is provided using Direct Line, but it is also available for the rest of types of channels: WhatsApp or Auraline.
@startuml
title: User message that is recognized as a FAQ
    actor User
    participant Channel #bdf492
    participant DirectLine #FFCC99
    participant DirectLineWebsocket #FFCC99
    participant AuthenticationApi #FFFF99
    participant AuraGroot #76bbe7
    participant AuraBot #41a0f9

    Channel -> DirectLineWebsocket: Open WebSocket
    User -> Channel: Send [Phrase that starts FAQ dialog]
    Channel -> DirectLine: Send {activity[Phrase that starts FAQ dialog]}
    DirectLine -> AuraGroot: Send {activity[Phrase that starts FAQ dialog]}
    AuraGroot -> DirectLine: 200 OK
    AuraGroot -> AuraGroot: Middlewares
    AuraGroot -> AuraGroot: Recognizers (GetSkillByChannel)
    AuraGroot -> AuraBot: Send {activity[Phrase that starts FAQ dialog]}
    AuraBot -> AuraGroot: 200 OK
    AuraBot -> AuthenticationApi: GET AuraId
    AuthenticationApi -> AuraBot: 404 Not found (Anonymous)
    AuraBot -> AuraBot: Middlewares
    AuraBot -> AuraBot: Recognizers
    AuraBot -> AuraBot: Main Dialog
    AuraBot -> AuraBot: Execute FAQ dialog
    AuraBot -> AuraBot: filterFaqWithContext(faq, user, channelData.contextFilters)
    AuraBot -> AuraGroot: Send {faqResponse}
    AuraGroot -> AuraBot: 200 OK
    AuraGroot -> DirectLine: Send {faqResponse}
    DirectLine -> AuraGroot: 200 OK
    Channel -> DirectLineWebsocket: Read {faqResponse}
    Channel -> User: Show {faqResponse}
@enduml
User message that leads to a dialog that needs an asynchronous API request to be resolved
This experience is defined in the guidelines for building a dialog that uses async APIs.
The example is provided using WhatsApp, but is also available for the rest of types of channels: DirectLine or Auraline.
@startuml
title: Use case handling asynchronous requests
    actor User
    participant WhatsApp #f6b5ff
    participant DirectLine #FFCC99
    participant DirectLineWebsocket #FFCC99
    participant AuthenticationApi #FFFF99
    participant AuraGroot #76bbe7
    participant AuraBot #41a0f9
    participant AuraBridge #1add4d
    participant AuraBridgeOutbound #1add4d
    participant KernelWhatsAppApi #99FFFF
    participant AsyncApi #fc989b

    User -> WhatsApp: Request [message]
    WhatsApp -> KernelWhatsAppApi: Request [message]
    KernelWhatsAppApi -> AuraBridge: Request [message]
    AuraBridge -> KernelWhatsAppApi: 200 OK
    AuraBridge -> AuraGroot: Request [message]
    AuraGroot -> AuraBridge: 200 OK
    AuraGroot -> AuthenticationApi: GET AuraId
    AuthenticationApi -> AuraGroot: 200 OK {UserData}
    AuraGroot -> AuraGroot: GetSkillByChannel
    AuraGroot -> AuraBot: Request [message]
    AuraBot -> AuraGroot: 200 OK
    AuraBot -> AuraBot: See Basic WhatsApp flow for authenticated users
    AuraBot -> AuraBot: Recognizers
    AuraBot -> AuraBot: Main Dialog
    AuraBot -> AuraBot: Execute dialog that calls to an asynchronous API
    AuraBot -> AuraBot: The dialog inits bypass
    AuraBot -> AsyncApi: POST request
    AsyncApi -> AuraBot: 200 OK
    AsyncApi -> AuraBridge: POST async-callback/notifications with response data
    AuraBridge -> AsyncApi: 200 OK
    AuraBridge -> AuraGroot: Send [payload with response data]
    AuraGroot -> AuraBridge: 200 OK
    AuraGroot -> AuraBot: Send [payload with response data]
    AuraBot -> AuraGroot: 200 OK
    AuraBot -> AuraBot: Back to the dialog that opened the bypass
    AuraBot -> AuraBot: Process [payload with response data]
    AuraBot -> AuraGroot: Send [async request response]
    AuraGroot -> AuraBot: 200 OK
    AuraGroot -> AuraBridgeOutbound: Response to [message]
    AuraBridgeOutbound -> AuraGroot: 200 OK
    AuraBridgeOutbound -> KernelWhatsAppApi: Response to [message]
    KernelWhatsAppApi -> AuraBridgeOutbound: 200 OK
    KernelWhatsAppApi -> WhatsApp: Response to [message]
    WhatsApp -> User: Show response to [message]
@enduml
Message use case that receives files from the user
This experience is defined in the guidelines for using files in WhatsApp use cases.
The example is provided using WhatsApp, which is currently the only channel able to handle incoming files.
@startuml
title: Use case expecting files from the user
    actor User
    participant WhatsApp #f6b5ff
    participant AuthenticationApi #FFFF99
    participant AuraGroot #76bbe7
    participant AuraBot #41a0f9
    participant AuraBridge #1add4d
    participant AuraBridgeOutbound #1add4d
    participant KernelWhatsAppApi #99FFFF
    participant FileManager #fae193
    participant AzureStorage #dedddb

    User -> WhatsApp: Request [message]
    WhatsApp -> KernelWhatsAppApi: Request [message]
    KernelWhatsAppApi -> AuraBridge: Request [message]
    AuraBridge -> KernelWhatsAppApi: 200 OK
    AuraBridge -> AuraGroot: Request [message]
    AuraGroot -> AuraBridge: 200 OK
    AuraGroot -> AuthenticationApi: GET AuraId
    AuthenticationApi -> AuraGroot: 200 OK {UserData}
    AuraGroot -> AuraGroot: GetSkillByChannel
    AuraGroot -> AuraBot: Request [message]
    AuraBot -> AuraGroot: 200 OK
    AuraBot -> AuraBot: See Basic WhatsApp flow for authenticated users
    AuraBot -> AuraBot: Recognizers
    AuraBot -> AuraBot: Main Dialog
    AuraBot -> AuraBot: Execute dialog that requests a file from the user
    AuraBot -> AuraBot: The dialog inits bypass
    AuraBot -> AuraGroot: Send [Provide a file]
    AuraGroot -> AuraBot: 200 OK
    AuraGroot -> AuraBridgeOutbound: Response to [Provide a file]
    AuraBridgeOutbound -> AuraGroot: 200 OK
    AuraBridgeOutbound -> KernelWhatsAppApi: Response to [Provide a file]
    KernelWhatsAppApi -> AuraBridgeOutbound: 200 OK
    KernelWhatsAppApi -> WhatsApp: Response to [Provide a file]
    WhatsApp -> User: Show [Provide a file]
    User -> WhatsApp: Send [requested file]
    WhatsApp -> KernelWhatsAppApi: Request [requested file]
    KernelWhatsAppApi -> AuraBridge: Request [requested file]
    AuraBridge -> KernelWhatsAppApi: 200 OK
    AuraBridge -> AuraGroot: Request [requested file]
    Note over AuraBridge,AuraGroot: file is sent as an Attachment to the bot
    AuraGroot -> AuraBridge: 200 OK
    AuraGroot -> AuraGroot: GetSkillByChannel
    AuraGroot -> AuraBot: Request [activity[attachment[file]]]
    AuraBot -> AuraGroot: 200 OK
    AuraBot -> AuraBot: See Basic WhatsApp flow for authenticated users
    AuraBot -> AuraBot: Middleware that handles file attachments
    AuraBot -> AuraBot: check that a dialog was waiting for a file
    AuraBot -> FileManager: POST manage(file)
    FileManager -> AuraBot: 200 OK
    FileManager -> KernelWhatsAppApi: GET /media/file
    Note right of FileManager: In fact, file is passed by streaming from WhatsApp media API to Azure Storage
    KernelWhatsAppApi -> FileManager: 200 OK {fileStream}
    FileManager -> FileManager: validate(file)
    FileManager -> AzureStorage: POST upload(file)
    AzureStorage -> FileManager: 201 Created
    FileManager -> AuraBridge: POST async-callback/notifications with file validation data
    Note over FileManager,AuraBridge: FileManager response contains the file validation\nand the local Azure Storage URL where the file can be obtained.
    AuraBridge -> FileManager: 200 OK
    AuraBridge -> AuraGroot: Send [payload with file validation data]
    AuraGroot -> AuraBridge: 200 OK
    AuraGroot -> AuraBot: Send [payload with file validation data]
    AuraBot -> AuraGroot: 200 OK
    AuraBot -> AuraBot: Back to the dialog that waits for a file
    AuraBot -> AuraBot: Process [payload with file validation data]
    AuraBot -> AuraGroot: Send [file response]
    AuraGroot -> AuraBot: 200 OK
    AuraGroot -> AuraBridgeOutbound: Response to [file response]
    AuraBridgeOutbound -> AuraGroot: 200 OK
    AuraBridgeOutbound -> KernelWhatsAppApi: Response to [file response]
    KernelWhatsAppApi -> AuraBridgeOutbound: 200 OK
    KernelWhatsAppApi -> WhatsApp: Response to [file response]
    WhatsApp -> User: Show response to [file response]
@enduml
TV use cases
Currently, TV use cases are only available for authenticated users.
TV use case for channels with integration with channelData v3
Operational flow for TV use cases in channels integrated with channelData v3.
@startuml
title: TV use case for channelData V3
    actor User
    participant Channel #bdf492
    participant DirectLine #FFCC99
    participant DirectLineWebsocket #FFCC99
    participant AuthenticationApi #FFFF99
    participant AuraGroot #76bbe7
    participant AuraBot #41a0f9
    participant ComplexLogicApi #CCCCFF
    participant KernelVideoContentsApi #99FFFF

    Channel -> DirectLineWebsocket: Open WebSocket
    User -> Channel: Send [I want to see an action movie]
    Channel -> DirectLine: Send {activity[I want to see an action movie]}
    DirectLine -> AuraGroot: Send {activity[I want to see an action movie]}
    AuraGroot -> DirectLine: 200 OK
    AuraGroot -> AuraGroot: Middlewares
    AuraGroot -> AuraGroot: Recognizers (GetSkillByChannel)
    AuraGroot -> AuraBot: Send {activity[I want to see an action movie]}
    AuraBot -> AuraGroot: 200 OK
    AuraBot -> AuraBot: Basic DirectLine flow for authenticated users
    AuraBot -> AuraBot: Middlewares
    AuraBot -> AuraBot: Recognizers intent.tv.search
    AuraBot -> AuraBot: Main Dialog
    AuraBot -> AuraBot: Execute intent.tv.search Dialog
    AuraBot -> ComplexLogicApi: POST tv/query {intent: intent.tv.search, entities: movie, action}
    ComplexLogicApi -> KernelVideoContentsApi: GET /videocontents filter by user context and entities
    KernelVideoContentsApi -> ComplexLogicApi: 200 OK [{videoContent}]
    ComplexLogicApi -> AuraBot: 200 OK [{videoContent}]
    AuraBot -> AuraGroot: Send [{videoContent}]
    AuraGroot -> AuraBot: 200 OK
    AuraGroot -> DirectLine: Send [{videoContent}]
    DirectLine -> AuraGroot: 200 OK
    Channel -> DirectLineWebsocket: Read [{videoContent}]
    Channel -> User: Show [{videoContent}]
@enduml
TV use case for channels with integration with channelData v1
Operational flow for TV use cases in channels integrated with channelData v1.
This scenario is only available in Spain.
@startuml
title: TV use case for channelData V1
    actor User
    participant Channel #bdf492
    participant DirectLine #FFCC99
    participant DirectLineWebsocket #FFCC99
    participant AuthenticationApi #FFFF99
    participant AuraGroot #76bbe7
    participant AuraBot #41a0f9
    participant MovistarResolutionApi #CCCCFF
    participant KernelLegacyVideoApi #99FFFF

    Channel -> DirectLineWebsocket: Open WebSocket
    User -> Channel: Send [I want to see an action movie]
    Channel -> DirectLine: Send {activity[I want to see an action movie]}
    DirectLine -> AuraGroot: Send >{activity[I want to see an action movie]}
    AuraGroot -> DirectLine: 200 OK
    AuraGroot -> AuraGroot: Middlewares
    AuraGroot -> AuraGroot: Recognizers (GetSkillByChannel)
    AuraGroot -> AuraBot: Send {activity[I want to see an action movie]}
    AuraBot -> AuraGroot: 200 OK
    AuraBot -> AuraBot: Basic DirectLine flow for authenticated users
    AuraBot -> AuraBot: Middlewares
    AuraBot -> AuraBot: Recognizers intent.tv.search
    AuraBot -> AuraBot: Main Dialog
    AuraBot -> AuraBot: Execute intent.tv.search Dialog
    AuraBot -> MovistarResolutionApi: POST tv/query {intent: intent.tv.search, entities: movie, action}
    MovistarResolutionApi -> KernelLegacyVideoApi: GET /video filter by user context and entities
    KernelLegacyVideoApi -> MovistarResolutionApi: 200 OK [{videoContent}]
    MovistarResolutionApi -> AuraBot: 200 OK {[{videoContent}], [{suggestion}]}
    AuraBot -> AuraGroot: Send {[{videoContent}], [{suggestion}]}
    AuraGroot -> AuraBot: 200 OK
    AuraGroot -> DirectLine: Send {[{videoContent}], [{suggestion}]}
    DirectLine -> AuraGroot: 200 OK
    Channel -> DirectLineWebsocket: Read {[{videoContent}], [{suggestion}]}
    Channel -> User: Show {[{videoContent}], [{suggestion}]}
@enduml
1.4 - WhatsApp flowchart
WhatsApp flowchart
Key flowcharts for WhatsApp channel: basic, login and logout flows
WhatsApp basic flowchart
Flows for new messages from anonymous and authenticated users in the WhatsApp channel.
New WhatsApp message from anonymous user
@startuml
title: Basic flow for WhatsApp anonymous users
    actor User
    participant WhatsApp #f6b5ff
    participant KernelWhatsAppApi #99FFFF
    participant AuraBridge #1add4d
    participant AuraGroot #76bbe7
    participant AuthenticationApi #FFFF99
    participant AuraBot #41a0f9
    participant TACApi #66B2FF
    participant AuraBridgeOutbound #1add4d

    User -> WhatsApp: Request [message]
    WhatsApp -> KernelWhatsAppApi: Request [message]
    KernelWhatsAppApi -> AuraBridge: Request [message]
    AuraBridge -> KernelWhatsAppApi: 200 OK
    AuraBridge -> AuraGroot: Request [message]
    Note over AuraBridge,AuraGroot: WhatsApp channels use channelData V2 between AuraBridge and AuraGroot
    AuraGroot -> AuraBridge: 200 OK
    AuraGroot -> AuraGroot: GetSkillByChannel
    AuraGroot -> AuraBot: Request [message]
    AuraBot -> AuraGroot: 200 OK
    AuraBot -> AuthenticationApi: GET auraId
    AuthenticationApi -> AuraBot: 404 Not Found (Anonymous user)
    Note left of TACApi: See Terms and Conditions flow
    AuraBot -> TACApi: Check terms and conditions
    TACApi -> AuraBot: 200 OK
    AuraBot -> AuraBot: Recognizers
    AuraBot -> AuraBot: Main Dialog
    AuraBot -> AuraBot: Execute Specific functional Dialog
    AuraBot -> AuraGroot: Response to [message]
    AuraGroot -> AuraBot: 200 OK
    AuraGroot -> AuraBridgeOutbound: Response to [message]
    AuraBridgeOutbound -> AuraGroot: 200 OK
    AuraBridgeOutbound -> KernelWhatsAppApi: Response to [message]
    KernelWhatsAppApi -> AuraBridgeOutbound: 200 OK
    KernelWhatsAppApi -> WhatsApp: Response to [message]
    WhatsApp -> User: Show response to [message]
@enduml
New WhatsApp message from authenticated user
@startuml
title: Basic flow for WhatsApp authenticated users
    actor User
    participant WhatsApp #f6b5ff
    participant KernelWhatsAppApi #99FFFF
    participant AuraBridge #1add4d
    participant AuraGroot #76bbe7
    participant AuthenticationApi #FFFF99
    participant AuraBot #41a0f9
    participant TACApi #66B2FF
    participant KernelAuthServer #99FFFF
    participant KernelUserProfileApi #99FFFF
    participant AuraBridgeOutbound #1add4d

    User -> WhatsApp: Request [message]
    WhatsApp -> KernelWhatsAppApi: Request [message]
    KernelWhatsAppApi -> AuraBridge: Request [message]
    AuraBridge -> KernelWhatsAppApi: 200 OK
    AuraBridge -> AuraGroot: Request [message]
    Note over AuraBridge,AuraGroot: WhatsApp channels use channelData V2 between AuraBridge and AuraGroot
    AuraGroot -> AuraBridge: 200 OK
    AuraGroot -> AuraGroot: GetSkillByChannel
    AuraGroot -> AuraBot: Request [message]
    AuraBot -> AuraGroot: 200 OK
    AuraBot -> AuraBot: GET userCache(auraId)
    opt User is not in cache
        AuraBot -> AuthenticationApi: GET AuraId
        AuthenticationApi -> AuraBot: 200 OK {userData}
        AuraBot -> KernelAuthServer: POST /token
        Note over AuraBot,KernelAuthServer: Here, a 3legged accessToken is requested
        KernelAuthServer -> AuraBot: {token}
        AuraBot -> KernelAuthServer: getIntrospect(token)
        opt channel allows UserProfile
            AuraBot -> KernelUserProfileApi: getUserProfile(userId)
            KernelUserProfileApi -> AuraBot: UserProfile
        end
        AuraBot -> AuraBot: store user in cache: userData, userProfile, valid scopes and purposes
    end
    Note left of TACApi: See Terms and Conditions flow
    AuraBot -> TACApi: Check terms and conditions
    TACApi -> AuraBot: 200 OK
    AuraBot -> AuraBot: Recognizers
    AuraBot -> AuraBot: Main Dialog
    AuraBot -> AuraBot: Execute Specific functional Dialog
    AuraBot -> AuraGroot: Response to [message]
    AuraGroot -> AuraBot: 200 OK
    AuraGroot -> AuraBridgeOutbound: Response to [message]
    AuraBridgeOutbound -> AuraGroot: 200 OK
    AuraBridgeOutbound -> KernelWhatsAppApi: Response to [message]
    KernelWhatsAppApi -> AuraBridgeOutbound: 200 OK
    KernelWhatsAppApi -> WhatsApp: Response to [message]
    WhatsApp -> User: Show response to [message]
@enduml
Terms & Conditions flowchart
@startuml

title: Acceptance of terms and conditions flow
    actor User
    participant WhatsApp #f6b5ff
    participant KernelWhatsAppApi #99FFFF
    participant AuraBridge #1add4d
    participant AuraGroot #76bbe7
    participant AuthenticationApi #FFFF99
    participant AuraBot #41a0f9
    participant TACApi #66B2FF
    participant KernelAuthServer #99FFFF
    participant KernelUserProfileApi #99FFFF
    participant AuraBridgeOutbound #1add4d

    User -> WhatsApp: Request [message]
    WhatsApp -> KernelWhatsAppApi: Request [message]
    KernelWhatsAppApi -> AuraBridge: Request [message]
    AuraBridge -> KernelWhatsAppApi: 200 OK
    AuraBridge -> AuraGroot: Request [message]
    AuraGroot -> AuraBridge: 200 OK
    AuraGroot -> AuraGroot: GetSkillByChannel
    AuraGroot -> AuraBot: Request [message]
    AuraBot -> AuraGroot: 200 OK
    AuraBot -> AuraBot: GET userCache(auraId)
    alt User already accepted authenticated T&C or Channel doesn't have terms and conditions config
        AuraBot -> TACApi: GET termsAndConDitions(auraId)
        TACApi -> AuraBot: 200 OK
        Note left of AuraBot: See WhatSApp basic flow
        AuraBot -> AuraBot: Recognizers
        AuraBot -> AuraBot: Main Dialog
        AuraBot -> AuraBot: Execute Specific functional Dialog
        AuraBot -> AuraGroot: Response to [message]
        AuraGroot -> AuraBot: 200 OK
        AuraGroot -> AuraBridgeOutbound: Response to [message]
        AuraBridgeOutbound -> AuraGroot: 200 OK
        AuraBridgeOutbound -> KernelWhatsAppApi: Response to [message]
        KernelWhatsAppApi -> AuraBridgeOutbound: 200 OK
        KernelWhatsAppApi -> WhatsApp: Response to [message]
        WhatsApp -> User: Show response to [message]
    else User needs to accept authenticated T&C
        AuraBot -> TACApi: GET termsAndConditions(auraId)
        TACApi -> AuraBot: 404 Not found
        AuraBot -> AuraBot: executes terms and conditions dialog
        AuraBot -> AuraGroot: Send [onboarding messages]
        AuraGroot -> AuraBot: 200 OK
        AuraGroot -> AuraBridgeOutbound: Send [onboarding messages]
        AuraBridgeOutbound -> AuraGroot: 200 OK
        AuraBridgeOutbound -> KernelWhatsAppApi: Send [onboarding messages]
        KernelWhatsAppApi -> AuraBridgeOutbound: 200 OK
        KernelWhatsAppApi -> WhatsApp: Send [onboarding messages]
        WhatsApp -> User: Show [onboarding messages]
    end
@enduml
WhatsApp phone OTP (LoA2) authentication
Operational flow based on the whatsapp-otp-login global dialog.
The flow will be similar for email OTP method.
@startuml
title: WhatsApp authentication flow via phone OTP (LoA2)
    actor User
    participant WhatsApp #f6b5ff
    participant KernelWhatsAppApi #99FFFF
    participant AuraBridge #1add4d
    participant AuraGroot #76bbe7
    participant AuthenticationApi #FFFF99
    participant AuraBot #41a0f9
    participant TACApi #66B2FF
    participant KernelAuthServer #99FFFF
    participant KernelUserProfileApi #99FFFF
    participant AuraBridgeOutbound #1add4d

    User -> WhatsApp: I want to log in
    WhatsApp -> KernelWhatsAppApi: I want to log in
    KernelWhatsAppApi -> AuraBridge: I want to log in
    AuraBridge -> KernelWhatsAppApi: 200 OK
    AuraBridge -> AuraGroot: I want to log in
    AuraGroot -> AuraBridge: 200 OK
    AuraGroot -> AuraGroot: GetSkillByChannel
    AuraGroot -> AuraBot: Request [message]
    AuraBot -> AuraGroot: 200 OK
    note left of AuraGroot: See basic WhatsApp flow for anonymous users
    AuraBot -> AuraBot: basic whatsapp flow for anonymous user
    AuraBot -> AuraBot: Dialog needs auth and user is anonymous. Redirect to WhatsApp login dialog, step 1
    AuraBot -> AuraGroot: Send [Please, enter your phone number]
    AuraGroot -> AuraBot: 200 OK
    AuraGroot -> AuraBridgeOutbound: Send [Please, enter your phone number]
    AuraBridgeOutbound -> KernelWhatsAppApi: Send [Please, enter your phone number]
    KernelWhatsAppApi -> AuraBridgeOutbound: 200 OK
    KernelWhatsAppApi -> WhatsApp: Send [Please, enter your phone number]
    WhatsApp -> User: Send [Please, enter your phone number]
    User -> WhatsApp: phoneNumber
    WhatsApp -> KernelWhatsAppApi: phoneNumber
    KernelWhatsAppApi -> AuraBridge: phoneNumber
    AuraBridge -> KernelWhatsAppApi: 200 OK
    AuraBridge -> AuraGroot: phoneNumber
    AuraGroot -> AuraBridge: 200 OK
    AuraGroot -> AuraBot: phoneNumber
    AuraBot -> AuraGroot: 200 OK
    AuraBot -> AuraBot: Execute step 2 of WhatsApp login dialog
    AuraBot -> KernelWhatsAppApi: POST sendSMSOTPCode(phoneNumber)
    KernelWhatsAppApi -> AuraBot: 200 OK
    KernelWhatsAppApi -> User: [SMS] Your verification code is XXXX
    AuraBot -> AuraGroot: Send [Please, enter your phone number]
    AuraGroot -> AuraBot: 200 OK
    AuraGroot -> AuraBridgeOutbound: Send [Please, enter your phone number]
    AuraBridgeOutbound -> KernelWhatsAppApi: Send [Please, enter your phone number]
    KernelWhatsAppApi -> AuraBridgeOutbound: 200 OK
    KernelWhatsAppApi -> WhatsApp: Send [Please, enter your phone number]
    WhatsApp -> User: Send [Please, enter the verification code]
    User -> WhatsApp: XXXX
    WhatsApp -> KernelWhatsAppApi: XXXX
    KernelWhatsAppApi -> AuraBridge: XXXX
    AuraBridge -> KernelWhatsAppApi: 200 OK
    AuraBridge -> AuraGroot: XXXX
    AuraGroot -> AuraBridge: 200 OK
    AuraGroot -> AuraBot: XXXX
    AuraBot -> AuraGroot: 200 OK
    AuraBot -> AuraBot: Execute step 3 of WhatsApp login dialog
    AuraBot -> KernelWhatsAppApi: POST validateCode(phoneNumber, code)
    KernelWhatsAppApi -> AuraBot: 200 OK {authenticationContext}
    AuraBot -> AuthenticationApi: POST /users/auraId {authenticationContext}
    AuthenticationApi -> AuraBot: 201 Created
    alt  User has already accepted authenticated Terms and Conditions
        AuraBot -> TACApi: GET termsAndConditions(auraId)
        TACApi -> AuraBot: 200 OK
        AuraBot -> AuraGroot: Send [Great! you are now signed in]
        AuraGroot -> AuraBot: 200 OK
        AuraGroot -> AuraBridgeOutbound: Send [Great! you are now signed in]
        AuraBridgeOutbound -> AuraGroot: 200 OK
        AuraBridgeOutbound -> KernelWhatsAppApi: Send [Great! you are now signed in]
        KernelWhatsAppApi -> AuraBridgeOutbound: 200 OK
        KernelWhatsAppApi -> WhatsApp: Send [Great! you are now signed in]
        WhatsApp -> User: Show [Great! you are now signed in]
    else User needs to accept authenticated T&C
        AuraBot -> TACApi: GET termsAndConditions(auraId)
        TACApi -> AuraBot: 404 Not found
        AuraBot -> AuraGroot: Send [Great! you are now signed in]
        AuraGroot -> AuraBot: 200 OK
        AuraGroot -> AuraBridgeOutbound: Send [Great! you are now signed in]
        AuraBridgeOutbound -> AuraGroot: 200 OK
        AuraBridgeOutbound -> KernelWhatsAppApi: Send [Great! you are now signed in]
        KernelWhatsAppApi -> AuraBridgeOutbound: 200 OK
        KernelWhatsAppApi -> WhatsApp: Send [Great! you are now signed in]
        WhatsApp -> User: Show [Great! you are now signed in]
        AuraBridgeOutbound -> AuraGroot: intent.onboarding.terms-and-conditions from redirect intent configured for the channel
        AuraGroot -> AuraBridgeOutbound: 200 OK
        AuraGroot -> AuraBot: intent.onboarding.terms-and-conditions from redirect intent configured for the channel
        AuraBot -> AuraGroot: 200 OK
        AuraBot -> AuraBot: GET userCache(auraId)
        opt User is not in cache
            AuraBot -> AuthenticationApi: GET AuraId
            AuthenticationApi -> AuraBot: 200 OK {userData}
            AuraBot -> KernelAuthServer: POST /token
            Note over AuraBot,KernelAuthServer: Here, a 3legged accessToken is requested
            KernelAuthServer -> AuraBot: {token}
            AuraBot -> KernelAuthServer: getIntrospect(token)
            opt channel allows UserProfile
                AuraBot -> KernelUserProfileApi: getUserProfile(userId)
                KernelUserProfileApi -> AuraBot: UserProfile
            end
            AuraBot -> AuraBot: store user in cache: userData, userProfile, valid scopes and purposes
        end
        AuraBot -> AuraBot: executes Terms and Conditions dialog
        AuraBot -> AuraGroot: Send [onboarding messages]
        AuraGroot -> AuraBot: 200 OK
        AuraGroot -> AuraBridgeOutbound: Send [onboarding messages]
        AuraBridgeOutbound -> AuraGroot: 200 OK
        AuraBridgeOutbound -> KernelWhatsAppApi: Send [onboarding messages]
        KernelWhatsAppApi -> AuraBridgeOutbound: 200 OK
        KernelWhatsAppApi -> WhatsApp:  Send [onboarding messages]
        WhatsApp -> User: Show [onboarding messages]
    else Channel doesn't have terms and conditions config
        AuraBot -> AuraGroot: Send [Great! you are now signed in]
        AuraGroot -> AuraBot: 200 OK
        AuraGroot -> AuraBridgeOutbound: Send [Great! you are now signed in]
        AuraBridgeOutbound -> AuraGroot: 200 OK
        AuraBridgeOutbound -> KernelWhatsAppApi: Send [Great! you are now signed in]
        KernelWhatsAppApi -> AuraBridgeOutbound: 200 OK
        KernelWhatsAppApi -> WhatsApp: Send [Great! you are now signed in]
        WhatsApp -> User: Show [Great! you are now signed in]
    end
@enduml
WhatsApp logout
Operational flow based on the whatsapp-logout global dialog.
@startuml
title: WhatsApp logout flow
    actor User
    participant WhatsApp #f6b5ff
    participant KernelWhatsAppApi #99FFFF
    participant AuraBridge #1add4d
    participant AuraGroot #76bbe7
    participant AuthenticationApi #FFFF99
    participant AuraBot #41a0f9
    participant KernelAuthServer #99FFFF
    participant KernelUserProfileApi #99FFFF
    participant AuraBridgeOutbound #1add4d

    User -> WhatsApp: I want to logout
    WhatsApp -> KernelWhatsAppApi: I want to logout
    KernelWhatsAppApi -> AuraBridge: I want to logout
    AuraBridge -> KernelWhatsAppApi: 200 OK
    AuraBridge -> AuraGroot: I want to logout
    AuraGroot -> AuraBridge: 200 OK
    AuraGroot -> AuraBot: I want to logout
    AuraBot -> AuraGroot: 200 OK
    AuraBot -> AuraBot: Basic whatsapp flow for authenticated users
    AuraBot -> AuthenticationApi: DELETE /users/auraId
    AuthenticationApi -> AuraBot: 204 NO_CONTENT
    AuraBot -> KernelWhatsAppApi: DELETE /sessions/authorizationId
    KernelWhatsAppApi -> AuraBot: 204 NO_CONTENT
    AuraBot -> AuraGroot: Send [You're successfully logged out, discover what can be done with Aura]
    AuraGroot -> AuraBot: 200 OK
    AuraGroot -> AuraBridgeOutbound: Send [You're successfully logged out, discover what can be done with Aura]
    AuraBridgeOutbound -> AuraGroot: 200 OK
    AuraBridgeOutbound -> KernelWhatsAppApi: Send [You're successfully logged out, discover what can be done with Aura]
    KernelWhatsAppApi -> AuraBridgeOutbound: 200 OK
    KernelWhatsAppApi -> WhatsApp: Send [You're successfully logged out, discover what can be done with Aura]
    WhatsApp -> User: Show [You're successfully logged out, discover what can be done with Aura]
@enduml
1.5 - Auraline flowcharts
Auraline flowcharts
Basic flowcharts for Auraline channels message flow.
Auraline basic flowcharts
Auraline channel handled by an external skill
This flowchart shows the interaction of anonymous users requesting a use case handled by an external skill.
@startuml
title: Auraline anonymous user using external skill
    actor User
    participant Channel #bdf492
    participant AuraBridge #1add4d
    participant AuraGroot #76bbe7
    participant ExternalSkill #B266FF
    participant AuraBridgeOutbound #1add4d

    User -> Channel: Request [message]
    Channel -> AuraBridge: Request [message]
    AuraBridge -> Channel: 200 OK
    AuraBridge -> AuraGroot: Request [message]
    Note over AuraBridge,AuraGroot: Auraline  channels use channelData V3 between AuraBridge and AuraGroot
    AuraGroot -> AuraBridge: 200 OK
    AuraGroot -> AuraGroot: GetSkillByChannel
    AuraGroot -> ExternalSkill: Request [message]
    ExternalSkill -> AuraGroot: 200 OK
    ExternalSkill -> ExternalSkill: Process [message]
    ExternalSkill -> AuraGroot: Send [response]
    AuraGroot -> ExternalSkill: 200 OK
    AuraGroot -> AuraBridgeOutbound: Send [response]
    AuraBridgeOutbound -> AuraGroot: 200 OK
    AuraBridgeOutbound -> Channel: Send [response]
    Channel -> User: Show [response]
    alt Channel should use status endpoint to inform Aura whether or not the sent activities are shown to the user
        Channel -> AuraBridge: Send [status]
        AuraBridge -> Channel: 200 OK
        AuraBridge -> AuraBridge: log status
    end
@enduml
2 - Hot swapping in Aura
Hot swapping in Aura
Description of Aura processes that can be executed without service outage
Introduction
The objective of the current documents is to describe the available actions that can be carried out over Aura through hot swapping processes, that is, without interrupting its operation. These actions include the update, insertion or removal of specific components or resources. The modifications resulting from these processes can be available immediately without the need to wait for the deployment of a subsequent Aura Platform release.
Despite the previous definition, performing a specific hot swapping process within a component can impact other components. In such cases, it becomes necessary to either restart the affected component or carry out a particular action to mitigate any potential issues or conflicts.
Available hot swapping processes and associated impact
The following table illustrates the available hot swapping processes against key Aura components, the impact of the process over each of them and the consequent actions that must be executed afterwards.
Each hot swapping process in the table is fully described in the document Hot swapping processes.
|——-|————-|———————-|————|———-|———-|————-|————|————————-|——————|———————|——————|———|————————|
| 1. Update locales | Restart | Restart | Restart | aura-configuration-updater
Make-up | N/A | N/A | N/A | N/A | N/A | N/A | N/A | N/A | N/A |
| 2. Update NLP packages | N/A | N/A | N/A | N/A | Restart | NO | N/A | N/A | N/A | N/A | N/A | N/A | N/A |
| 3. Modify TV use cases (User helper) | N/A | N/A | N/A | N/A | N/A | Restart | N/A | N/A | N/A | N/A | N/A | N/A | N/A |
| 4. Channels handling | Restart | Restart | Reload | Make-up | Restart | Restart | Restart | NO | Reload| Restart | Restart | N/A |
| 5. Skills handling | N/A | N/A | Reload | N/A | N/A | N/A | N/A | N/A | N/A | N/A | N/A | N/A | N/A |
| 6. Applications handling | N/A | N/A | N/A | N/A | N/A | N/A | N/A | N/A | Reload | N/A | N/A | N/A | N/A |
| 7. Add new local dialogs in aura-bot | N/A | N/A | N/A | DeployLocal | N/A | N/A | N/A | N/A | N/A | N/A | N/A | N/A | N/A |
| 8. Update libraries and dialogs configuration | N/A | N/A | N/A | aura-configuration-updater | N/A | N/A | N/A | N/A | N/A | N/A | N/A | N/A | N/A |
| 9. Add static resources in a uc | N/A | N/A | N/A | aura-configuration-updater | N/A | N/A | N/A | N/A | N/A | N/A | N/A | N/A | N/A |
| 10. Review indexes definitions | N/A | N/A | Make-up | Make-up | N/A | N/A | Make-up | Make-up | N/A | N/A | Make-up | Force | Make-up |
Legend
- N/A: The change does not apply to the component
- NO: The change does not apply to the component, unless a condition is met
- Restart: the component will be restarted automatically by the config-watcher. The restart is executed pod by pod, with no impact to final users
- Reload: the component is not restarted, but its configuration will be reloaded automatically by the config-watcher.
- aura-configuration-updater: The hot swapping process must be executed using aura-configuration-updater.
- Make-up: the make-up of the component is executed during the deploy phase: both with
deploy-core and deploy-local. Take into account that aura-configuration-updater is included into the deploy_local process
- DeployLocal: the component is automatically restarted after the execution of its make-up
- Force: a restart of the component must be executed manually
Notes
2.1 - Hot swapping processes
Hot swapping processes in Aura
Key processes that can be done over Aura without service outage
1. Update of locales: Hot swapping of POEditor texts
By doing so, the update of locales will be available without the need to wait for the next Aura Platform release.
Be aware of the impact of both processes over certain Aura components: Available hot swapping processes and associated impact - Item 1 in table.
2. Update of NLP packages
When developing a use case over Aura NLP, the understanding model including the trainings and test set files must be deployed.
If OBs are interested in the update of an NLP package through a hot swapping process, the local DevOps Team can execute two different procedures, which are equivalent in terms of outcome and impact on the system. Therefore, OBs have the freedom to choose whichever process they prefer.
-
Through aurak8s installer: Local NLP deployment
-
Through the use of Aura Operator: NlpTraining
By doing so, the updated NLP package will be available without the need to wait for the next Aura Platform release.
Be aware of the impact of both processes over certain Aura components: Available hot swapping processes and associated impact - Item 2 in table.
3. Modify TV use cases
Certain modifications in TV use cases (channels mapping, specific experiences, etc.) can be executed through a hot swapping process. They correspond to experiences that are managed by the User_helper component and, specifically, by the M+ Resolution module, that resolves TV use cases calling different APIs.
If OBs are interested in the update of a TV use case through a hot swapping process, the local DevOps Team can execute two different procedures, which are equivalent in terms of outcome and impact on the system. Therefore, OBs have the freedom to choose whichever process they prefer.
-
Through aurak8s installer: Local ResolutionResources deployment
-
Through the use of Aura Operator: ResolutionResources
Be aware of the impact of both processes over certain Aura components: Available hot swapping processes and associated impact - Item 3 in table.
4. Channels handling
The execution of changes in the configuration of channels can be done through a hot swapping process using the aura-configuration-api component.
This process is fully described in the document Update channels configuration.
Be aware of the impact of this process over certain Aura components: Available hot swapping processes and associated impact - Item 4 in table.
5. Skills handling
The hot swapping processes that can be executed in the framework of skills management are included in the document Hot swapping processes in Aura distributed architecture and include adding a new skill to aura-root, modifying it or deleting an existing one.
Be aware of the impact of this process over certain Aura components: Available hot swapping processes and associated impact - Item 5 in table.
6. Applications handling
The execution of changes in the configuration of applications, the components in charge of the communitation of a channel, service or skill with aura-gateway-api for the connection with an external service, can be done through a hot swapping process using the aura-configuration-api component.
This process is fully described in the document Hot swapping processes in Aura Applications Configurations.
Be aware of the impact of this process over certain Aura components: Available hot swapping processes and associated impact - Item 7 in table.
7. Add new local dialog in aura-bot
The deployment of a new local dialog over a specific Aura Platform release can be done through a hot swapping process, following the guidelines Local modules deployment.
Be aware of the impact of this process over certain Aura components: Available hot swapping processes and associated impact - Item 8 in table.
8. Update of libraries and dialogs configuration
Aura allows making changes in certain aura-bot configuration related to libraries, dialogs and channels through hot swapping processes:
contextFilters of the intents in aura-bot dialogs- Scopes and purposes in aura-bot libraries and dialogs
These processes can be done using the aura-configuration-updater.
Be aware of the impact of this process over certain Aura components: Available hot swapping processes and associated impact - Item 9 in table.
9. Add static resources in a use case
When developing a use cases, aura response can include static resources such as visual components (cards), such as icons, images, diagrams, etc.
If required, the update of these resources can be done through a hot swapping process, following the guidelines included here.
These processes can also be done using the aura-configuration-updater.
Doing that, the updated static resources will be available in the period between one release and the consecutive one.
Be aware of the impact of this process over certain Aura components: Available hot swapping processes and associated impact - Item 10 in table.
10. Review indexes definitions
Due to the continuous evolution of the Aura Platform, it is possible that the indexes definitions of the different components need to be reviewed and updated. This process can be done through a make-up process.
If required, the update of these indexes can be done through a hot swapping process, uploading a new index definition file to Azure Blob Storage, in the container aura-configuration/AURA-VERSION and then executing the make-up process of the corresponding component.
Follow the guidelines Manage MongoDB Indexes to understand how to define a new index file.
Be aware of the impact of this process over certain Aura components: Available hot swapping processes and associated impact - Item 11 in table.
3 - Make-up processes
Aura make-up processes
The current section describes the make-up processes that take place within Aura
Introduction
Make-up is a set of operations to prepare an environment once a module has been deployed, but before it starts. There is a different make-up job per module, that executes the operations needed before the module starts. The operations that a make-up process can perform are the following, although not all modules have to perform all these tasks.
-
The current document includes general definitions needed to understand this process.
-
The make-up specific processes for each module are specified in its corresponding document:
-
Learn how to manage the indexes of a MongoDB database in the make-up index manager
General definitions
Load External Libraries
This process is in charge of loading external modules, called libraries, which contain their own resources, locale, environment variables, code.
Manage MongoDB Indexes
Indexes in MongoDB are managed by a module called Make-up Index Manager documentation.
It relies on a versioned index configuration file to apply the indexes. Only those indexes whose version has not been applied before will be applied. The configuration file can be loaded from a remote repository. By default, all components with MongoDB access have one index configuration file.
There is a tool within each module called makeup-cli to run the make-up process as a stand-alone task.
Prepare Locale Resources
This process is responsible for collecting all the language resources and uploading them to a remote repository, so that they can be changed on the fly if necessary.
If external libraries have been loaded, this process unifies the language resources.
See Locale Manager Documentation.
Set Environment Variables
This process is executed when the module loads external libraries that contain its own environment variables, unifying all these environment variables in a single file.
Prepare Remote Channel Config
It is responsible for unifying the different configurations assigned by each external library to the channels.
Process Resources
This process manages the different resources of each external library and promotes them so that they are accessible when the main program is running.
3.1 - Aura Bot make-up
Aura Bot make-up process
The current section describes the make-up processes that take place within Aura Bot
Introduction
The make-up process in aura-bot runs by using the following command:
npm run makeup
All the processes that are executed during the aura-bot make-up are detailed in the following sections.
Environments variables for Aura Bot make-up
Mandatory variables
| Name |
| AURA_MICROSOFT_AZURE_STORAGE_ACCOUNT |
| AURA_MICROSOFT_AZURE_STORAGE_ACCESS_KEY |
| AURA_DEFAULT_LOCALE |
| AURA_STATIC_RESOURCE_ENDPOINT |
| AURA_STATIC_RESOURCE_SAS_TOKEN |
| AURA_VERSION |
Optional variables
These optional variables, together with their default values, are shown below. However, it can use some other optional variables, which can be checked out in the aura-bot make-up script in Github.
| Name |
Default value |
| AURA_MAKEUP_FILES_ORIGIN |
blob |
| AURA_MAKEUP_FILES_DESTINATION |
blob |
| AURA_AUTHORIZATION_HEADER |
|
| AURA_RESOURCES_PREFIX |
’libraries' |
| AURA_SERVICE_ENVIRONMENT |
|
| AURA_MAKEUP_MODE |
‘full’ |
| AURA_CHANNELS_CONFIGURATION_API_ENDPOINT |
|
| AURA_CONFIGURATION_CONTAINER |
‘aura-configuration’ |
| AURA_CHANNELS_CONFIGURATION_API_ENDPOINT |
|
| AURA_CHANNELS_CONFIGURATION_BLOB |
‘bot-response.json’ |
| AURA_DIALOG_CONFIG_FILENAME |
‘merged-dialog-config.json’ |
| AURA_LOCAL_RESOURCES_PATH |
’local-resources' |
| AURA_LOCAL_RESOURCES_PORT |
3000 |
Load External Libraries
In this process, which is fully automated, the instance will be made-up, joining general configuration and i18n with library-specific ones.
The external libraries loaded by aura-bot are the different dialogs assigned to the use cases. This list of libraries is listed in the plugin-config.json file.
plugin-config.json
[
    "@telefonica/aura-bot-common-library",
    "@telefonica/aura-bot-disambiguation-library",
    "@telefonica/aura-bot-generic-library",
    {
        "exclude": [
            "./handover-genesys/handover-bypass-dialog",
            "./handover-genesys/handover-status-dialog"
        ],
        "packagePath": "@telefonica/aura-bot-handover-library"
    },
    "@telefonica/aura-bot-miscellaneous-library",
    "@telefonica/aura-bot-none-library",
    "@telefonica/aura-bot-onboarding-library",
    "@telefonica/aura-bot-tv-library",
    {
        "exclude": [
            "./wifi-check-connectivity-dialog",
            "./wifi-connect-to-guest-dialog",
            "./wifi-enable-disable-guest-dialog"
        ],
        "packagePath": "@telefonica/aura-bot-wifi-library"
    },
    "@telefonica/aura-bot-la-amazon",
    "@telefonica/aura-bot-la-iberia",
    "@telefonica/mi-movistar-beta",
    "@telefonica/generic-faq"
]
The make-up process is in charge of loading all these libraries and unifying the different resources they contain. Each environment contains the libraries associated with the required use cases.
Manage MongoDB Indexes
The indexes configuration file is in /settings/makeup/aura-bot-mongodb-indexes.json.
aura-bot-mongodb-indexes.json (partial)
{
  "databases": {
    "aura-bot": {
      "aura-version-control": {
        "version": 1,
        "removeIndex": [],
        "removeAllData": "",
        "indexes": [
          {
            "version": 1,
            "name": "idx_name",
            "keys": {
              "name": 1
            },
            "unique": true
          }
        ]
      },
      "aura-caches": {
        "version": 1,
        "removeIndex": [],
        "removeAllData": "",
        "indexes": [
          {
            "version": 1,
            "name": "idx_item_caches",
            "keys": {
              "item": 1
            },
            "unique": true
          },
          {
            "version": 1,
            "name": "idx_ttl_caches",
            "keys": {
              "lastAccess": 1
            },
            "expireAfterSeconds": 3600
          }
        ]
      },
      "aura-context": {
        "version": 1,
        "removeIndex": [],
        "removeAllData": "",
        "indexes": [
          {
            "version": 1,
            "name": "idx_aura_last_access",
            "keys": {
              "lastAccess": 1
            },
            "expireAfterSeconds": 3600
          }
        ]
      },
      "aura-external-kpi":
      .....
Once the make-up is executed, this file will be uploaded to the assigned repository [AURA-STORAGE]/aura-configuration/[AURA_VERSION]/aura-bot-mongodb-indexes.json. If this remote file exists, it has priority over the local file.
This configuration is assigned in the make-up process by means of the following model:
  const options: MakeupMongoIndexManagerOptions = {
        mongodbConfiguration: {
            AURA_MONGODB_URI: configuration.AURA_MONGODB_URI,
            AURA_MONGODB_DB_NAME: configuration.AURA_MONGODB_BOT_DATABASE,
            AURA_MONGODB_USERNAME: configuration.AURA_MONGODB_USERNAME,
            AURA_MONGODB_PASSWORD: configuration.AURA_MONGODB_PASSWORD,
            AURA_MONGODB_POOL_SIZE: configuration.AURA_MONGODB_POOL_SIZE,
            AURA_MONGODB_SSL: configuration.AURA_MONGODB_SSL
        },
        fileConfiguration: {
            containerName: 'aura-configuration',
            localPath: 'settings/makeup',
            remotePath: '',
            files: [{ name: 'aura-bot-mongodb-indexes.json', mimeType: 'application/json' }]
        },
        replaceLocalWithRemote: true,
        storageCredentials: {
            storageKey: configuration.AURA_MICROSOFT_AZURE_STORAGE_ACCESS_KEY,
            storageName: configuration.AURA_MICROSOFT_AZURE_STORAGE_ACCOUNT
        },
        uploadFromLocalToRemote: true,
        auraVersion: configuration.AURA_VERSION,
        ignoreDownloadErrors: true,
        ignoreUploadErrors: true,
        dataBaseSuffix: configuration.AURA_ENVIRONMENT_NAME
    }
Prepare Locale Resources
Each library may contain a settings/locale folder, with one or more i18n locale files (settings/locale/<lang>.json).
These locale files will be merged by language (in case of conflict, the latest loaded library overrides the previous one), and then merged with global locale files in aura-bot/locale/<lang>.json, taking precedence the global version in case of conflict.
All keys are sorted in resulting JSON files, to increase the readability.
For these local files to be merged, it is required to expose them in the locale property when registering the plugin. This will be done within the file index.ts, as shown in the following example:
import * as libraryUtil from '@telefonica/aura-bot-utilities/lib/aura-bot-library-util';
(...)
const settingsPath = path.resolve(__dirname, '..', 'settings');
register(null, {
    my_library: {
        locale: libraryUtil.readLocaleFolder(path.resolve(settingsPath, 'locale')),
        (...)
    }
});
The language resources in aura-bot are located in /locale/:
 de-de.json
 en-gb.json
 es-es.json
 pt-br.json
When starting aura-bot, these files are loaded remotely from [AURA-STORAGE]/static-resources/[AURA_VERSION]/locale/.
In the make-up process, the language resources of each loaded external library are merged into one file per language and then uploaded to Azure Storage using uploadFile method.
File example:
{
    "common:common.error.main": [
        "Aura no está disponible en estos momentos. Por favor, inténtalo un poco más tarde"
    ],
    "common:common.goodbyes.main": [
        "¡Hasta la vista!",
        "¡Hasta pronto! Espero haber podido ayudarte"
    ],
    "common:common.greetings.main": [
        "Hola, buenas",
        "Hola, estoy aquí para ayudarte"
    ]
}
Note that all the keys should start with the name of the library followed by a colon (":"). In the bot, this library name will be appended automatically, so only the last part of the key must be used in the dialogs.
Set Environment Variables
Each library may contain .env files within the folder settings or settings/{DEV|PRE|PRO} (some vars could have a specific value per environment).
If the AURA_SERVICE_ENVIRONMENT environment variable is set, the settings/.env file will be merged with settings/<AURA_SERVICE_ENVIRONMENT>/.env (taking precedence the env-specific values in case of conflict).
Every file is optional. After that, the resulting .env file from each library will be merged together and written down in aura-bot/.env.libraries. Note that this file has the lowest precedence when loading environmental variables in aura-bot.
Multiline values are escaped in order to allow the dotenv library to successfully read the values, even though it is recommended not using them.
For these .env files to be merged, it is required to expose them in the env property when registering the plugin. This will be done within the file index.ts, as shown in the following example:
import * as libraryUtil from '@telefonica/aura-bot-utilities/lib/aura-bot-library-util';
(...)
const settingsPath = path.resolve(__dirname, '..', 'settings');
register(null, {
    my_library: {
        env: libraryUtil.readEnv(settingsPath),
        (...)
    }
});
All the environment variables of each external library are merged together with the aura-bot environment variables and assigned as environment variables to the container or containers that will be in charge of raising their corresponding Pods in Kubernetes.
File example:
MYLIBRARY_VERSION=1.2.3
MYLIBRARY_ENDPOINT=https://my-library.test/v1
Note that to avoid conflicts, the env vars specific for a library should start with the library name in uppercase followed by an underscore ("_").
Prepare Remote Channel Config
Each library may contain dialog-config.json files or dialog-config.<AURA_BOT_DEFAULT_LOCALE>.json files.
The AURA_DEFAULT_LOCALE environment variable is required while AURA_SERVICE_ENVIRONMENT is optional. If AURA_SERVICE_ENVIRONMENT is set, these 4 files will be fetched and configuration is merged (the highest in the list means more priority in case of conflict):
- (1) settings/<AURA_SERVICE_ENVIRONMENT>/dialog-config.<AURA_BOT_DEFAULT_LOCALE>.json
- (2) settings/<AURA_SERVICE_ENVIRONMENT>/dialog-config.json
- (3) settings/dialog-config.<AURA_DEFAULT_LOCALE>.json
- (4) settings/dialog-config.json
In case AURA_SERVICE_ENVIRONMENT is not set, only #3 and #4 files are fetched and merged.
After that, the resulting dialog config from each library will be merged together. Then, the config is added to every channel in the config file pointed out by AURA_CHANNEL_CONFIGURATION_ENDPOINT (except the dialogs containing an only_in string array property, that are not added to channels not present in that property) replacing dialog_libraries from each channel. Then the resulting file is uploaded to Azure, replacing the previous one.
For these files to be merged, it is required to expose them in the config property when registering the plugin. This will be done within the file index.ts, as shown in the following example:
import * as libraryUtil from '@telefonica/aura-bot-library-util';
(...)
const settingsPath = path.resolve(__dirname, '..', 'settings');
register(null, {
    my_library: {
        config: libraryUtil.readDialogConfig(settingsPath),
        (...)
    }
});
Use onlyIn property
In some cases, the dialog configuration can differ among channels for the same country. In these cases, the onlyIn property must be used in the dialog-config.<AURA_DEFAULT_LOCALE>.json file:
{
    "name": "tv",
    "authorization": {
        "purposes": "customer-self-service",
        "scopes": "subscribed-products-user-read"
    },
    "dialogs": [
        {
            "id": "tv-carousel-info",
            "suggestions": false,
            "triggerConditions": [
                {
                    "intent": "intent.carousel.info"
                },
                {
                    "intent": "intent.tv.details"
                }
            ],
            "onlyIn": [
                "movistar-plus"
            ]
        }
   ]
}
This configuration file is built by merge each channel configuration from each external library and uploaded to [AURA-STORAGE]/aura-configuration/bot-response.json using uploadStringAsBlob and/or (according to AURA_MAKEUP_FILES_DESTINATION) uploading channel information in aura-configuration-api.
bot-response.json (partial)
[
  {
    "channel_id": "45494a5b-835a-4fff-a813-b3d2be529dbe",
    "fpa_auth_purposes": "customer-self-service detect-abnormal-usage device-recommendations-v3 sim-upgrade-suggestion aura-read-insight-events identify-customer bolt-on-suggestion",
    "fpa_auth_scopes": "device-catalog:devices-read device-stock:stock-read",
    "name": "novum-mytelco",
    "nlp": {
      "enabled": true,
        "enabled": true
      }
    },
    "prefix": "nov",
    "dialogLibraries": [
      {
        "name": "generic",
        "dialogs": [
          {
            "id": "get-generic",
            "triggerConditions": [
              {
                "intent": "intent.greetings"
              }
            ]
          }
        ]
      },
      {
        "name": "bill",
        "dialogs": [
          {
            "id": "balance-check",
            "suggestions": true,
            "authorization": {
              "purposes": "customer-self-service",
              "scopes": "mobile-balance-read"
            },
            "triggerConditions": [
              {
                "intent": "intent.balance.check",
                "contextFilters": [
                  {
                    "name": "Anonymous redirect to linking",
                    "type": "type",
                    "conditions": "/type eq 'anonymous'",
                    "true": {
                      "name": "Anonymous redirect to linking",
                      "breakDialogExecution": true,
                      "breakFilterEval": true,
                      "redirectToIntent": "intent.account.linking",
                      "suggestions": false
                    }
                  },
                  {
                    "name": "user_type_multimsisdn_not_allowed",
                    "type": "user_type_filter",
                    "conditions": "/type eq 'multimsisdn'",
                    "true": {
                      "name": "user_type_not_allowed_action_true",
                      "breakDialogExecution": true,
                      "breakFilterEval": true,
                      "resource": "context-filter:multimsisdn-users-intent-not-allowed.text",
                      "suggestions": false
                    }
                  },
...
Process Resources
Each library may contain a resources folder with images or any other binary files. If present, those files are uploaded to Azure container pointed by AURA_SERVICE_ENVIRONMENT env var, within libraries/<library> virtual path.
This uploading process could last longer than the other make-up steps, so the process could throw errors after showing that the make-up process is finished (with pending uploading processes).
The following snippet shows how to use those files within the dialogs (it will take AURA_STATIC_RESOURCE_ENDPOINT and AURA_STATIC_RESOURCE_SAS_TOKEN env vars from the environment):
import * as libraryUtil from '@telefonica/aura-bot-library-util';
(...)
const wholeUrl = getResourcePath('my_library', 'icon.png');
If we need to retrieve an image with specific device resolution as coming in the imageSettings resolution field of activity channelData, we should use getImageUrl method as follows:
import { getImageUrl } from '@telefonica/aura-bot-library-util';
[...]
const wholeUrlWithResolution = getImageUrl(stepContext.context, 'my_library', 'icon.png', configuration);
In libraries, the resources path must be exposed in the resources property when registering the plugin. This will be done within the file index.ts, as shown in the following example:
register(null, {
    my_library: {
        resources: path.resolve(__dirname, '..', 'resources'),
        (...)
    }
});
In the aura-bot make-up process the resources of each external library are uploaded to Azure Storage so that they can be later consumed by them. Remote path: [AURA-STORAGE]/static-resources/libraries/[LIBRARY_NAME].
3.2 - Aura bridge make-up
Aura Bridge make-up process
The current section describes the make-up processes that take place within Aura Bridge
Environment variables for Aura bridge make-up
Mandatory environment variables
AURA_ENVIRONMENT_NAME
AURA_MICROSOFT_AZURE_STORAGE_ACCESS_KEY
AURA_MICROSOFT_AZURE_STORAGE_ACCOUNT
AURA_MONGODB_PASSWORD
AURA_MONGODB_URI
AURA_MONGODB_USERNAME
AURA_VERSION
Optional environment variables
These optional variables, together with their default values, are shown below.
AURA_LOCALE_FOLDER                      # Default: ./locale
AURA_LOCALE_REMOTE_CONTAINER            # Default: 'static-resources
AURA_LOCALE_REMOTE_CONTAINER_PREFIX     # Default: aura-bridge/locale
AURA_MAKEUP_MODE                        # Default: full
AURA_MICROSOFT_AZURE_STORAGE_CONFIGURATION_CONTAINER  # Default: aura-configuration
AURA_MONGODB_POOL_SIZE                  # Default: 60
AURA_MONGODB_SSL                        # Default: false
AURA_SWAGGER_LOCAL_CORE_PATH            # Default: swagger-core.yaml
AURA_SWAGGER_LOCAL_PATH                 # Default: swagger.yaml
AURA_SWAGGER_REMOTE_CONTAINER_PREFIX    # Default: swagger
BRIDGE_MONGODB_DATABASE_CACHE           # Default: aura-bridge
Manage MongoDB Indexes
In this task, the make-up is responsible for creating the necessary indexes in the MongoDB database. These indexes will only be created if the AURA_MAKEUP_MODE variable is configured to “full”.
The indexes configuration file is in /settings/makeup/aura-bridge-mongodb-indexes.json. An example of this file is shown below.
{
    "version":2.3,
    "databases": {
        "aura-bridge-caches": {
            "directline-cache": {
                "version": 1,
                "indexes": [
                    {
                        "version": 1,
                        "name": "idx_item_caches",
                        "keys": {
                            "item": 1
                        },
                        "unique": true
                    },
                    {
                        "version": 1,
                        "name": "idx_ttl_caches",
                        "keys": {
                            "lastAccess": 1
                        },
                        "expireAfterSeconds": 3600
                    }
                ]
            },
            "dev-behavior-cache": {
                "version": 2,
                "indexes": [
                    {
                        "version": 2,
                        "name": "idx_ttl_caches",
                        "keys": {
                            "lastAccess": 1
                        },
                        "expireAfterSeconds": 3600
                    }
                ]
            },
            "bridge-message-queue": {
                "version": 2.3,
                "indexes": [
                    {
                        "version": 2.2,
                        "name": "idx_ttl_caches",
                        "keys": {
                            "expiresAt": 1
                        },
                        "expireAfterSeconds": 0,
                        "force": true
                    },
                    {
                        "version": 2.2,
                        "name": "idx_queue_search",
                        "keys": {
                            "conversationId": 1,
                            "requestId": 1
                        },
                        "force": true,
                        "unique": false
                    },
                    {
                        "version": 2.2,
                        "name": "idx_first_message",
                        "keys": {
                            "conversationId": 1,
                            "requestTimestamp": 1,
                            "responseTimestamp": 1
                        },
                        "unique": false,
                        "force": true
                    },
                    {
                        "version": 2.2,
                        "name": "idx_ack_find",
                        "keys": {
                            "responseId": 1
                        },
                        "unique": false,
                        "force": true
                    },
                    {
                        "version": 2.3,
                        "name": "idx_ack_find_async_id",
                        "keys": {
                            "asyncResponseId": 1
                        },
                        "unique": false,
                        "force": true
                    }
                ]
            }
        }
    }
}
Once the make-up is executed, this file will be uploaded to the assigned repository [AURA-STORAGE]/aura-configuration/[AURA_VERSION]/aura-bridge-mongodb-indexes.json. If this remote file exists, it has priority over the local file.
This configuration is assigned in the make-up process by means of the following model:
    const options: MakeupMongoIndexManagerOptions = {
        mongodbConfiguration: {
            AURA_MONGODB_URI: configuration.AURA_MONGODB_URI,
            AURA_MONGODB_DB_NAME: configuration.BRIDGE_MONGODB_DATABASE_CACHE,
            AURA_MONGODB_USERNAME: configuration.AURA_MONGODB_USERNAME,
            AURA_MONGODB_PASSWORD: configuration.AURA_MONGODB_PASSWORD,
            AURA_MONGODB_POOL_SIZE: configuration.AURA_MONGODB_POOL_SIZE,
            AURA_MONGODB_SSL: configuration.AURA_MONGODB_SSL
        },
        fileConfiguration: {
            containerName: 'aura-configuration',
            localPath: 'settings/makeup',
            remotePath: '',
            files: [{ name: 'aura-bridge-mongodb-indexes.json', mimeType: 'application/json' }]
        },
        replaceLocalWithRemote: true,
        storageCredentials: {
            storageKey: configuration.AURA_MICROSOFT_AZURE_STORAGE_ACCESS_KEY,
            storageName: configuration.AURA_MICROSOFT_AZURE_STORAGE_ACCOUNT
        },
        uploadFromLocalToRemote: true,
        auraVersion: configuration.AURA_VERSION,
        ignoreDownloadErrors: true,
        ignoreUploadErrors: true,
        dataBaseSuffix: configuration.AURA_ENVIRONMENT_NAME
    }
Prepare Locale Resources
This task will only be created if the AURA_MAKEUP_MODE variable is configured to full.
The language resources in aura-bridge are located in /locale/:
 en-gb.json
 es-es.json
When starting an aura-bridge, these files are loaded remotely from [AURA-STORAGE]/static-resources/aura-bridge/[AURA_VERSION]/locale/.
In the make-up process, the language resources are uploaded to Azure Storage.
Prepare unified swagger
aura-bridge is composed of a set of plugins in which each one is responsible for a single task. Processor or API plugins can have a swagger that defines the complete definition of the service.
In this task, the make-up process is responsible for unifying all these swaggers defined in each plugin in a single and unified swagger. This swagger is used by the oastool in the server’s start-up phase.
To create this unified swagger, the make-up process uses a swagger-core.yaml file that defines the base of the final swagger file.
The process for the creation of this unified swagger is as follows:
- The
swagger-core.yaml file is used as a base.
- Each
swagger.yaml file of each plugin is merged with the swagger-core.yaml:
- Fields
'components.schemas', 'components.securitySchemes' and 'paths' are merged using Object.assign.
- Field
'tags' is added using Array.push.
graph LR
    subgraph Unified swagger from plugins and swagger-core.yaml
      A[swagger-core.yaml] --> Z[swagger.yaml]
      B[swagger.yaml -> admin-plugin] --> Z[swagger.yaml]
      C[swagger.yaml -> whatsapp-incoming-processor] --> Z[swagger.yaml]
      D[swagger.yaml -> genesys-directline-processor] --> Z[swagger.yaml]
    end
It is important to know that entities with the same name defined in different plugins will be overwritten and the last processing will be used during the Swagger unification process (as in paths and securityschemes).
3.3 - Authentication server make-up
Aura authentication server make-up process
The current section describes the make-up processes that take place within Aura authentication server
Manage MongoDB Indexes
The indexes configuration file is in /settings/makeup/aura-authentication-mongodb-indexes.json.
Once the make-up is executed, this file will be uploaded to the assigned repository [AURA-STORAGE]/aura-configuration/[AURA_VERSION]/aura-authentication-mongodb-indexes.json. If this remote file exists, it has priority over the local file.
This configuration is assigned in the make-up process by means of the following model:
   const options: MakeupMongoIndexManagerOptions = {
        mongodbConfiguration: {
            AURA_MONGODB_URI: configuration.AURA_MONGODB_URI,
            AURA_MONGODB_DB_NAME: configuration.AURA_MONGODB_USER_DB,
            AURA_MONGODB_USERNAME: configuration.AURA_MONGODB_USERNAME,
            AURA_MONGODB_PASSWORD: configuration.AURA_MONGODB_PASSWORD,
            AURA_MONGODB_POOL_SIZE: configuration.AURA_MONGODB_POOL_SIZE,
            AURA_MONGODB_SSL: configuration.AURA_MONGODB_SSL
        },
        fileConfiguration: {
            containerName: 'aura-configuration',
            localPath: 'settings/makeup',
            remotePath: '',
            files: [{ name: 'aura-authentication-mongodb-indexes.json', mimeType: 'application/json' }]
        },
        replaceLocalWithRemote: true,
        storageCredentials: {
            storageKey: configuration.AURA_MICROSOFT_AZURE_STORAGE_ACCESS_KEY,
            storageName: configuration.AURA_MICROSOFT_AZURE_STORAGE_ACCOUNT
        },
        uploadFromLocalToRemote: true,
        auraVersion: configuration.AURA_VERSION,
        ignoreDownloadErrors: true,
        ignoreUploadErrors: true,
        dataBaseSuffix: configuration.AURA_ENVIRONMENT_NAME
    };
Prepare Locale Resources
The language resources in Aura Authentication Service are located in /locale/:
de-de.json
en-gb.json
es-es.json
When starting an Aura Authentication Service, these files are loaded remotely from [AURA-STORAGE]/static-resources/authentication/locale/[AURA_VERSION]/.
In the make-up process, the language resources are uploaded to Azure Storage.
Process Resources
In the make-up process of Aura Authentication Service, the resources are loaded from /settings/resources/ and upload to [AURA-STORAGE]/static-resources/authentication/resources/[AURA_VERSION]/.
3.4 - Make-up index manager
Make-up index manager
Make-up Index Manager allows managing the indexes of a MongoDB database
Introduction
The Make-up Index Manager is an utility for the management of indexes of a MongoDB database. This configuration can be loaded remotely.
Find more information in the Github repository:
https://github.com/Telefonica/aura-common-utilities/tree/master/packages/aura-utilities/src/aura-makeup-index-manager/
Configuration
This module uses a MakeupMongoIndexManagerOptions model to manage the process.
MakeupMongoIndexManagerOptions
| Property |
Type |
Description |
| storageCredentials |
StorageCredentials |
Credentials of Azure Storage. |
| fileConfiguration |
FileConfiguration |
The configuration file structure to manage the files. |
| mongodbConfiguration |
any |
MongoDB config (*) |
| replaceLocalWithRemote |
boolean |
If true and if a remote file exist, this replaces the local one. |
| uploadFromLocalToRemote |
boolean |
If true and if a remote file does not exist, it uploads the local one. |
| ignoreDownloadErrors |
boolean |
If true, if any file cannot be downloaded, it stops the process and returns an error. |
| ignoreUploadErrors |
boolean |
If true, if any file cannot be uploaded, it stops the process and returns an error. |
| auraVersion |
string |
Aura version, used to store the remote file in a folder with this value. Optional. |
| dataBaseSuffix |
string |
Used to rename the MongoDB with a suffix of Aura Environment.
Example: for the value “ap-current”, the aura-bot database will be “aura-bot-ap-current”. There is an environment variable AURA_ENVIRONMENT_NAME in aura-bot to get this value. Optional. |
(*) The MongoDB configuration has not got a model defined yet. This is the used by MongoDB Index Manager:
  AURA_MONGODB_URI
  AURA_MONGODB_DB_NAME
  AURA_MONGODB_USERNAME
  AURA_MONGODB_PASSWORD
  AURA_MONGODB_POOL_SIZE
  AURA_MONGODB_SSL
An example is shown below:
   const options: MakeupMongoIndexManagerOptions = {
        mongodbConfiguration: {
            AURA_MONGODB_URI: configuration.AURA_MONGODB_URI,
            AURA_MONGODB_DB_NAME: configuration.AURA_MONGODB_BOT_DATABASE,
            AURA_MONGODB_USERNAME: configuration.AURA_MONGODB_USERNAME,
            AURA_MONGODB_PASSWORD: configuration.AURA_MONGODB_PASSWORD,
            AURA_MONGODB_POOL_SIZE: configuration.AURA_MONGODB_POOL_SIZE,
            AURA_MONGODB_SSL: configuration.AURA_MONGODB_SSL
        },
        fileConfiguration: {
            containerName: 'aura-configuration',
            localPath: 'settings/makeup',
            remotePath: '',
            files: [{ name: 'aura-bot-mongodb-indexes.json', mimeType: 'application/json' }]
        },
        replaceLocalWithRemote: true,
        storageCredentials: {
            storageKey: configuration.AURA_MICROSOFT_AZURE_STORAGE_ACCESS_KEY,
            storageName: configuration.AURA_MICROSOFT_AZURE_STORAGE_ACCOUNT
        },
        uploadFromLocalToRemote: true,
        auraVersion: configuration.AURA_VERSION,
        ignoreDownloadErrors: true,
        ignoreUploadErrors: true,
        dataBaseSuffix: configuration.AURA_ENVIRONMENT_NAME
    };

    const makeupIndexManager = new MakeupIndexManager(options);
    await makeupIndexManager.process();
This utility uses downloadFiles to download index files.
MongoDB Index Manager
This module allows managing the indexes of a MongoDB database manager through a configuration file.
Configuration
IndexManagerModel
| Property |
Type |
Description |
| version |
number |
Index manager’s version. |
| databases |
object |
Object with databases names as properties. |
| forceToVersion |
number |
Force to use a base version to update indexes and collections. Optional. |
| rollback |
boolean |
Flag to initialize rollback procedure. Optional. |
VersionControlModel
| Property |
Type |
Description |
| version |
number |
Index manager’s version. |
| name |
string |
Internal name module for supporting version control in other modules. |
| timestamp |
Date |
Date of version applied. |
IndexManagerCollectionModel
| Property |
Type |
Description |
| version |
number |
Version of changes. |
| indexes |
IndexModel[] |
Array of indexes to generate or update. |
| isPrefix |
boolean |
Check if prefix if present or not. Optional. |
| removeIndex |
string[] |
Array of indexes names. For deleting all indexes in a collection, use ["*"]. Optional. |
| removeAllData |
string |
Parameter to remove all collection data. Use the collection name in upper case for validation. Optional. |
IndexModel
| Property |
Type |
Description |
| version |
number |
Version of changes. |
| name |
string |
Name of the index. |
| keys |
IndexKeyModel |
Document fields to generate the indexes. |
| unique |
boolean |
It indicates if the key is unique for a document or not. Optional. |
| partialFilterExpression |
boolean |
If the index is partial, expression which filters specific documents to apply the index. Optional. |
| expireAfterSeconds |
number |
Number of seconds when the index expires. For this, keys must contain a field datetime. Optional. |
| collation |
boolean |
It indicates if language-specific rules for string comparison to index apply or not. Optional. |
An example is shown below:
{
  "databases": {
    "aura-bot": {
      "aura-version-control": {
        "version": 1,
        "removeIndex": [],
        "removeAllData": "",
        "indexes": [
          {
            "version": 1,
            "name": "idx_name",
            "keys": {
              "name": 1
            },
            "unique": true
          }
        ]
      }
    }
  }
}
Manage index with specific version
When an index configuration file is applied, the affected database generates or updates a collection called aura-control-version. In this collection, the history of index application and the last version applied are stored. This is to avoid generating indexes that have already been created.
If we want to force the generation of an index for a specific version, we can indicate it in the forceToVersion field of the configuration file. For example, if we are in version 1 and we want to generate a new index to the collection without modifying this version, we must force to the version previous to the one that currently has the database.
Example:
The database has the version 1 and we need apply a index with this version: we need to force it.
{
  "databases": {
    "forceToVersion": 0,
    "aura-bot": {
      "aura-version-control": {
        "version": 1,
        "removeIndex": [],
        "removeAllData": "",
        "indexes": [
          {
            "version": 1,
            "name": "idx_name",
            "keys": {
              "name": 1
            },
            "unique": true
          }
        ]
      }
    }
  }
}
Rollbacks
Rollbacks are possible with the MongoDB Index Manager. A rollback forces MongoDB to generate the indexes on one or more other databases exactly as they are described in the configuration file, regardless of the version number.
In order to perform a rollback, it is necessary to have a configuration file. This configuration file can be generated manually or via the Mongo Index Manager Client.
Example of file configuration to make a rollback:
{
  "rollback": true,
  "databases": {
    "aura-bot": {
      "aura-version-control": {
        "version": 1,
        "removeIndex": [],
        "removeAllData": "",
        "indexes": [
          {
            "version": 1,
            "name": "idx_name",
            "keys": {
              "name": 1
            },
            "unique": true
          }
        ]
      }
    }
  }
}
First of all, the indexes will be removed and then will be regenerated as described in the configuration file.
Mongo Index Manager Cli
This utility allows us to perform index management operations of a MongoDB database. You can also generate the index configuration file of one or several MongoDB databases.
Command Line
node .\lib\mongo-index-manager-cli.js <options>
Options
- -f, –fileIndex: Input or output file with the Index Configuration File path.
- -a, –appName: Suffix for the databases. Example: “ap-current”. Optional.
- -r, –rollback: Generates an exact index structure to the configuration file regardless of versions. Optional.
- -d, –deleteOnly: Only delete all indexes. Optional
- -c, –connection: MongoDB Uri: mongodb://[username:password@]host1[:port1][,…hostN[:portN]][/[defaultauthdb][?options]].
- -u, –mongoUser: MongoDB Username. Optional but mandatory if the user does not exist in connection parameter.
- -p, –mongoPassword: MongoDB Password. Optional but mandatory if the password does not exist in connection parameter.
Examples
-
Generate an Index Configuration File from MongoDB
node ./lib/mongo-index-manager-cli.js -g -c mongodb://localhost:27017 -u username -p password -f index-configuration-file.json
-
Remove Indexes: Remove all indexes of collections that exist in the Configuration File.
Configuration File (file.json)
  {
      "databases": {
    "aura-bot": {
      "aura-version-control": {
        "version": 1,
        "removeIndex": [],
        "removeAllData": "",
        "indexes": [
          {
            "version": 1,
            "name": "idx_name",
            "keys": {
              "name": 1
            },
            "unique": true
          }
        ]
      }
    }
  }
  }
node ./lib/mongo-index-manager-cli.js -d -c mongodb://localhost:27017 -u username -p password -f file.json
  {
  "rollback": true,
  "databases": {
    "aura-bot": {
      "aura-version-control": {
        "version": 1,
        "removeIndex": [],
        "removeAllData": "",
        "indexes": [
          {
            "version": 1,
            "name": "idx_name",
            "keys": {
              "name": 1
            },
            "unique": true
          }
        ]
      }
    }
  }
}
node ./lib/mongo-index-manager-cli.js -d -c mongodb://localhost:27017 -u username -p password -f file.json
  {
  "databases": {
    "aura-bot": {
      "aura-version-control": {
        "version": 1,
        "removeIndex": [],
        "removeAllData": "",
        "indexes": [
          {
            "version": 2,
            "name": "idx_name",
            "keys": {
              "name": 1
            },
            "unique": true
          }
        ]
      }
    }
  }
}
node ./lib/mongo-index-manager-cli.js -c mongodb://localhost:27017 -u username -p password -f file.json
4 - Manage locales
Manage locales in Aura
The aim of this document is both general and specific processes to describe how locales are handled by Aura Bot services
Introduction
Locales in Aura refer to specific content for an OB and a language, in which any special variant preference that an OB wants to see in its user interface is included.
Localization is an important aspect of internationalization and localization (i18n) for the adaptation of internationalized software for a specific region or language by translating text and adding locale-specific components.
The current section includes key documents to manage locales in Aura:
4.1 - General guidelines
General guidelines for locales management
The aim of this document is to describe how locales are handled by Aura Bot services for the following components: aura-groot, aura-authentication-api, aura-bridge, aura-bridge-outbound.
⚠️ Remember that hot swapping of aura-bot locales must be done through the aura-configuration-updater
Introduction
The objective of the current document is to describe the hot swapping process to update POEditor texts in Aura without service outage, both for global and local use cases. Hereinafter, we will refer it as hot swapping process.
For each type of use cases, the process uses different projects and has a different scope, as shown in the following table.
| Global use cases |
Local use cases |
| - Aura POEditor global project (owned by Aura Global Team) |
- Aura POEditor local project (owned by L-CDO Team) |
| - Scope: edition of texts |
- Scope: edition of texts and definition of resources |
|
|
In both cases, the texts correspond to PRE and PRO resources in POEditor.
Follow the orderly guidelines in the succeeding sections:
⚠️ If you have local use cases, you must carry out the process included in this document for update POEditor texts each time a new version of your local use cases is deployed.
Previous steps
Previous steps include the management of POEditor itself for the edition of texts and, depending on the use case type, the generation of resources. These tasks are fully defined in the corresponding documents:
Generation of POEditor token
Once the texts have been modified in POEditor, it is necessary to have a Read-only API Token in order to import them into aura-bot.
- Global Use Cases: developers should request the read-only API Token to the APE Team.
- Local Use Cases: developers should request the read-only API Token to the local responsible of POEditor project.
The reading token is obtained from the POEditor website, where the OB edits the texts.
Figure 1. Add readonly API token
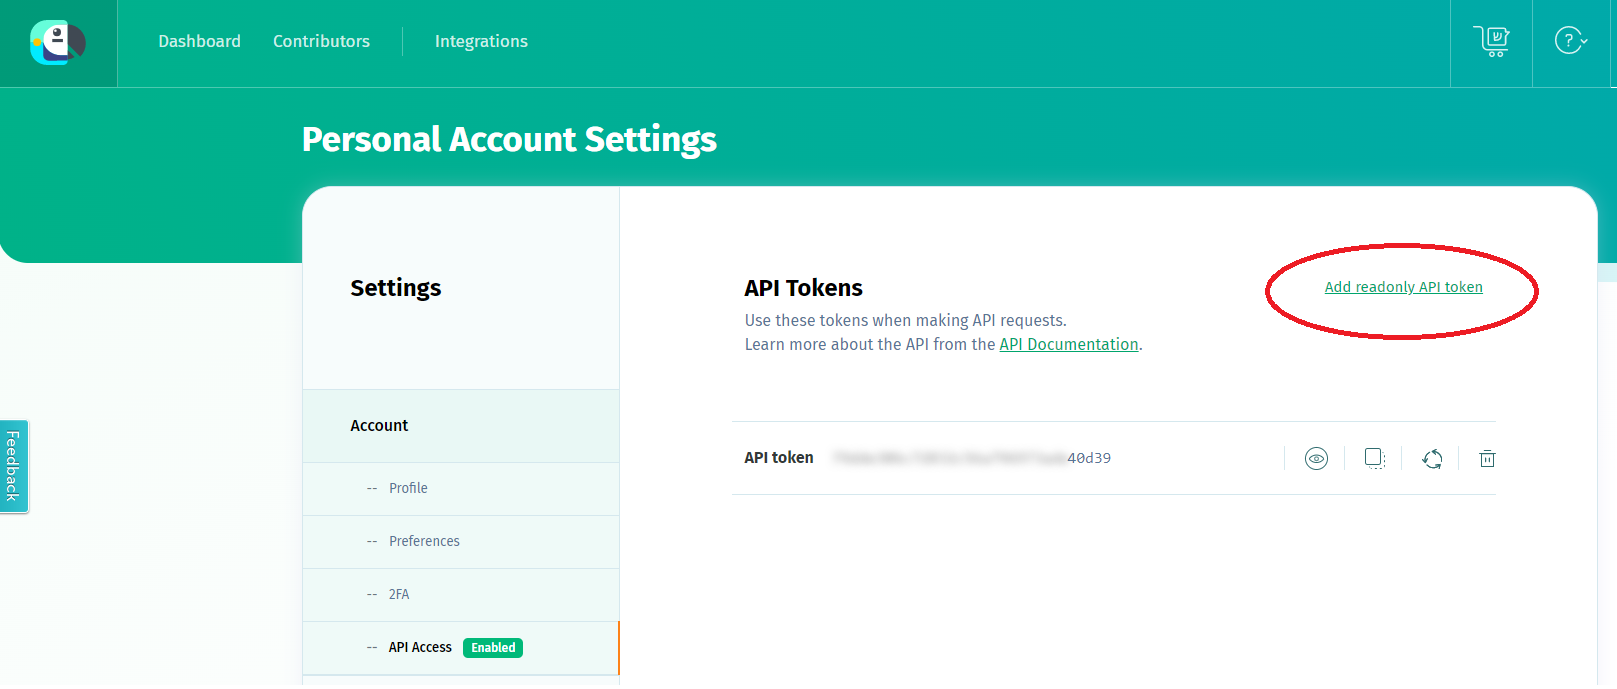
Figure 2. API access
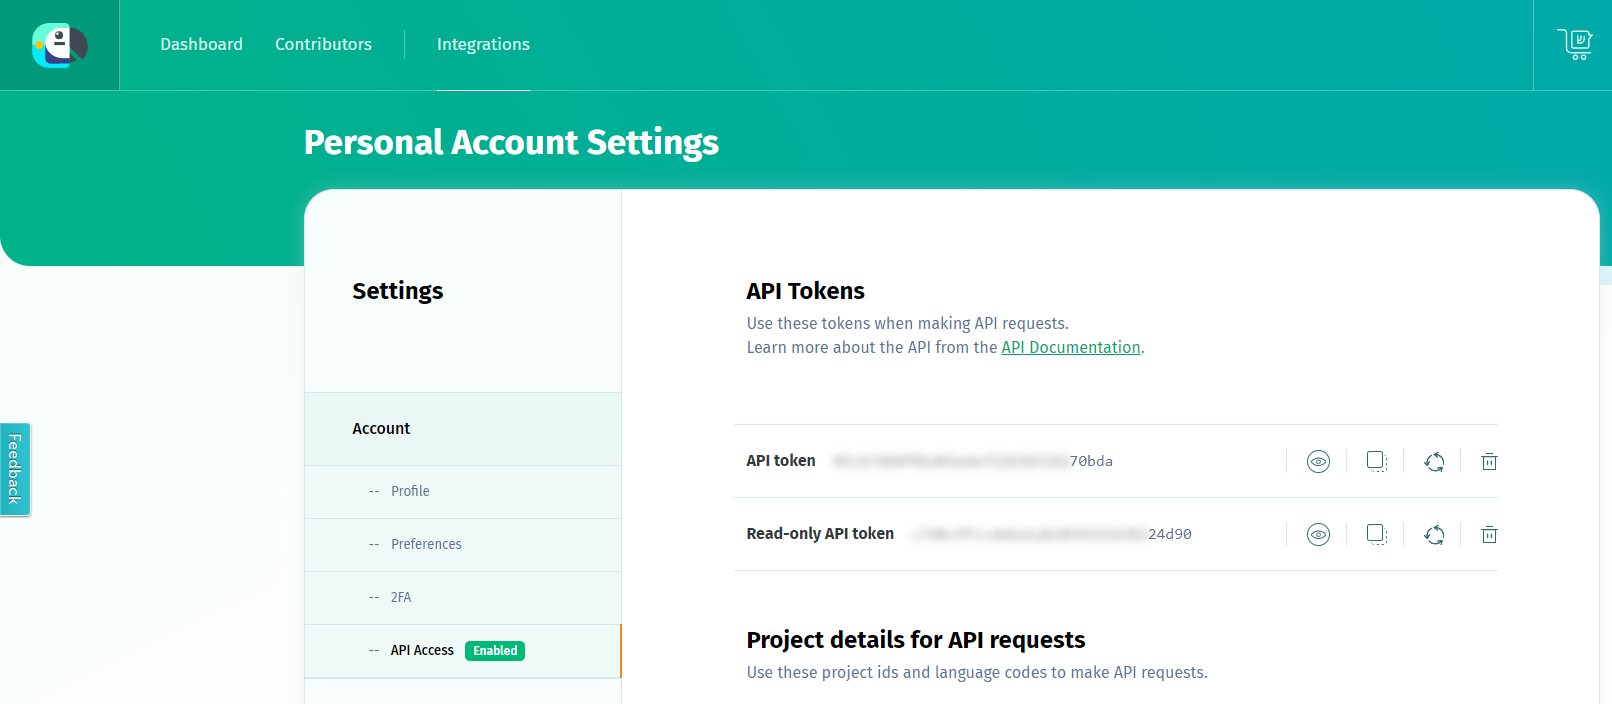
Importing locale files with aura-locale-importer tool
We recommend using aura-locale-importer tool, a utility developed by Aura Global Team that allows to handle the importation and exportation of locale files with POEditor.
-
Install aura-locale-importer tool:
1.1. Log in NPM to download the private NPM package dependencies. You can log in with user/password or using the token:
- User/password -> npm login
- Token -> Add the token to your environment variables on your machine. Follow the guidelines for mac/linux.
1.2. Install the npm application globally in the host. You can use two equivalent commands for installing the latest available version:
npm install –g @telefonica/aura-locale-importer
or
npm i @telefonica/aura-locale-importer -g
-
Copy in a local directory the file containing the locale resources to be updated (JSON file from aura-bot/locale/ directory). If there is no file, the aura-locale-importer tool will generate one.
-
Get full locale files to be uploaded:
$ aura-locale-importer -u -l <language-country> -j <POEditor project> -b <my-library> -d <local-directory> -m library -f –t <token>
Where:
-l <language-country>: country translation e.g., es-es, de-de, en-gb. If this field is empty, the system will import every translation file.-j <POEditor project>: POEditor project to be used:- For global use cases: aura-bot project (global project)
- For local use cases: name of the OB’s local project
-b <my-library>: specific libraries to be uploaded in the hot swapping process. For
example: fill this parameter with authentication for aura-authentication-api, or fill it with bridge for aura-bridge.-d <local-directory>: local directory where result files will be imported.-f: this parameter forces the files overwriting.-m library: it indicates the way of working. For the current release, it must be library.-t <token>: read-only API token to access to POEditor.
Here, developers can follow two different processes:
a. Define it in the environment variable $POEDITOR_TOKEN in the host running the process. In this case, this command should not be included here.
b. Add it in the current command within -t <token>
An example for a local use case in Germany is shown below:
The output will be:
de-de.json
Locale files uploading
This process requires certain previous steps, as all the resources and texts (from the bot core, global use cases or local use cases) must be merged together during the make-up process.
- Access the Azure blob container
static-resources in your intended environment, where the JSON file with your resources and texts is. This file will be in the following paths, depending on the component:
It is recommended to use Azure Storage Explorer in order to easily access this file.
Figure 3. Updating locale files to Azure
-
Download this file for its edition.
-
Add the new content from the imported locale files to the downloaded files or replace the specific content.
For example, you can add a new resource from the imported file (Section 4.3.) to the end of the file downloaded from Azure (Step 1). Or you could replace one of the texts appearing in the downloaded file (Step 1) with one of the new texts shown in the imported file.
-
Validate the JSON format through the online tool JSONLint.
-
Upload again the JSON file into the corresponding Azure blob container (depending on the component, the locale file must be in a different container as explained in step 1).
Depending on the component, the files should be loaded into a different folder.
In case the folder in that path does not exist, please create it manually.
⚠️ It is recommended to make a backup copy before overwriting.
-
If you want to keep previous versions of the JSON files as a backup during testing, you must remove the JSON extension from the file name to prevent these files from also being imported into Aura. For example:
❌ <language-country>.json.backup
✔️ <language-country>.backup
This assures that only one JSON file is present for each language.
Make modifications available
Check LocaleManager configuration
Check the configuration of the component to be updated, aura-authentication-api or aura-bridge, following LocaleManager configuration, for instance:
$ kubectl –n <aura-ns> edit cm <authentication-api|aura-bridge>
⚠️ Firstly, read the document connecting to Kubernetes to know how to operate with Kubernetes in your environment.
Where:
<aura-ns> is aura namespace, with the following format: aura-<OB>-<environment>
The specific value for <aura-ns> is an output for the installation process and can be found in the path _output_install/*info.json, in the field services_namespace.
This will open a text editor (such as vi) showing the whole config map of the specified pod.
The servers aura-authentication-api and aura-bridge count on a series of environment variables that manage the process. Developers should check several items, shown in the following screenshots for both servers.
- You have the right Aura version: variable
AURA_VERSION.
- Verify the values for the Azure Storage account: variable
AURA_MICROSOFT_AZURE_STORAGE_ACCOUNT.
Figure 4. Check LocaleManager configuration
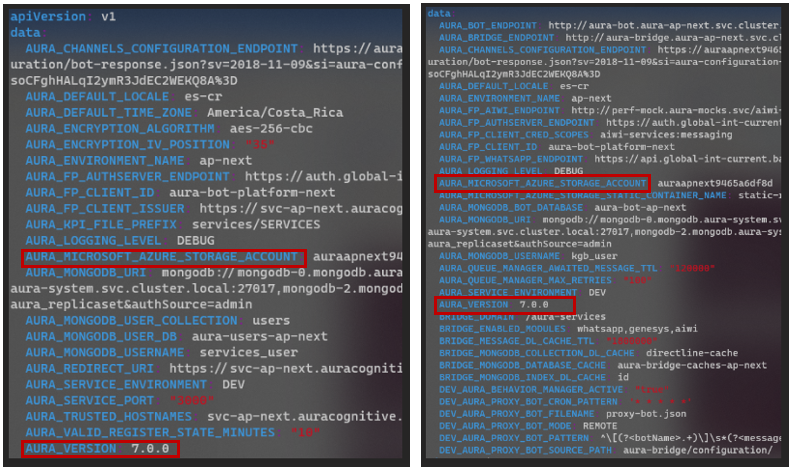
The definition of these variables is shown below:
AURA_VERSION: string with the semantic versioning of Aura to be read from the remote blob container. By default, it takes the version packaged originally in the docker image (7.0.0. in the case of Heroes). It is required to put a correct value, to be sure that the container is loading the correct set of files.AURA_MICROSOFT_AZURE_STORAGE_ACCOUNT: string with the name of the Azure Storage account related to the given aura deployment.
Restart the corresponding pod/pods
For the Kubernetes version 1.15 onwards, the following command must be launched for restarting the corresponding pod/pods.
- If developers have modified the locale file for aura-bridge, they will need to restart aura-bridge pods.
- The same applies for changes made in aura-authentication-api, its pod should only be restarted in case you modified the locale file in the folder for this component.
kubectl version >= 1.15:
$ kubectl rollout restart deployment [authentication-api, aura-bridge]
4.2 - Canonical phrases of intents
Manage locales for canonical phrases of intents
The aim of this document is to describe how to manage locales to include canonical phrases in intents
Introduction
Intents must have a canonical phrase to be able to disambiguate among them.
For this purpose, it is required to include canonical phrases for CLU intents in POEditor, within a section named “intent” and upload them to aura-bot deployment.
Two scenarios can arise here, distinguishing between global use cases and local ones.
Global use cases
a. Generate the locales in POEditor:
- Access the POEditor global project.
- Look for the specific resource of the global use case intent, that will have the format:
intent:[intent_name].
- Edit the text of the specific resource for the global intent including the canonical phrase for this intent.
b. Upload the locales to aura-bot deployment
-
The “intent” section of the global POEditor project is imported into the bot deployment by the global library:
telefonica/aura-bot-library-disambiguation
-
If the intent is handled by a global dialog, it must be added in the locale-changes file to be deployed after every local deployment. It must also be notified to the Global Team to add it to the global POEditor, so it can be included in the succeeding aura-bot release.
Local use cases
For local use cases (intents handled by a local dialog), OBs should include resources for the all the intents’ canonical phrases. Aura Global recommends to use local POEditor, although this is not mandatory. The main request for those local resources is to be included in the library in a format compatible with the bot, as explained below.
a. Generate the locales in POEditor:
- Access the POEditor local project
- Create the specific resource with the mandatory format:
intent:[intent_name].
For example, intent:intent.billing.check
- Edit the text of the resource with the canonical phrase for this intent
b. Upload the locales to aura-bot deployment
- To deploy these resources in the environment, it is required to upload them only from a library. Therefore, the ideal process would be either to use a library that is always deployed in the environment or to create an ad-hoc library to manage common processes and load into this library the section “intent” of the local POEditor project.
5 - Change the environment encryption key
Change the environment encryption key
Description of the process to change the encryption key without service loss
Introduction
This document describes how to change the encryption key of the Aura environments without service loss. The encryption key in Aura has three main usages:
- Generation and validation of the service APIKeys.
- Encryption of the secrets stored in the channels configuration settings.
- Encryption of temporary params shared with other systems to validate an incoming request. For instance, when authenticating a user using the “Redirect authentication” of Kernel IdP, to be able to validate the incoming request with the user data in the authentication callback, via the
state field, which is encrypted by Aura Bot and sent as query param to the authentication callback of Aura.
The mechanism proposed allows to validate APIKeys encrypted with several keys, whilst the servers use just the active encryption key for the rest of the functionalities.
Further information regarding how to configure the new encryption in the installer can be found in the deployment documentation.
Requirements
Docker and python3 installed in your local machine
- Also
Nodejs20 if want to try the snippet to generate the encryption keys.
- Access to the Aura installer
- Access to the
config.yml of your environment
Procedure
⚠️ It is important to do this change only during the installation of a new release of Aura, to avoid problems in the encryption of the channels collection and to let the installer generate automatically all the internal APIKeys.
- Generate a 32 character encryption key. The length is mandatory because of the encryption algorithm being used. The following snippet contains an example of how to generate it using Nodejs:
const crypto = require('crypto');
const key = crypto.randomBytes(16).toString('hex');
console.log(key);
- Encrypt it using ansible-vault:
ansible-vault encrypt_string 'old-encryptionkey,new-encryptionkey' --name 'aura_encryption_key'
New Vault password:
Confirm New Vault password:
Encryption successful
aura_encryption_key: !vault |
          $ANSIBLE_VAULT;1.1;AES256
          62393736616536336262613333313866366365396361643930653535633564636430343530303637
          3866643931653739343164303662376439316630633538620a663031306265613162353633323565
          33376662626162663431616132353436366431383064663131643363653636346336343433303637
          3666333534656439390a656132306236336337383761323166666430633463303461316561363632
          65396530323635323363316362343437623065353232339343731643031653961336137343664366
          162386564636561313532633662383366383364653362663530653563623362303164653137653039
          663430356237366439663238346130656432303737
- Configure it in the
config.yml of your environment:
vim config.yml
...
aura_encryption_key: !vault |
          $ANSIBLE_VAULT;1.1;AES256
          62393736616536336262613333313866366365396361643930653535633564636430343530303637
          3866643931653739343164303662376439316630633538620a663031306265613162353633323565
          33376662626162663431616132353436366431383064663131643363653636346336343433303637
          3666333534656439390a656132306236336337383761323166666430633463303461316561363632
          65396530323635323363316362343437623065353232339343731643031653961336137343664366
          162386564636561313532633662383366383364653362663530653563623362303164653137653039
          663430356237366439663238346130656432303737
...
- Now, the installer can be launched. The default encryption key is going to be
new-encryptionkey.
- The installer will generate all the internally used APIKeys, such as the one provided in the configuration of the services stored in the environment variable as
AURA_AUTHORIZATION_HEADER.
- Generate the new APIKeys for all the consumers of Aura’s APIs, using the tool of the installer to do it, following the instructions in generate APIKey section,
the APIKeys are going to be created directly with the default one.
- The APIKeys to be created depend on the environment, but take into account the following notes to update them all:
- The APIKey is used by all the channels accessing Aura via DirectLine, a new one per channel should be generated.
- The APIKey is used in the following webhooks or Aura APIs configured in Telefónica Kernel:
- WhatsApp webhooks
- Deployment of
aura-services API
- Deployment of
aura-aiservices API
- Once all the channels and Kernel configurations are changed to use the brand-new APIKeys, the environment configuration can be changed to count only with the default one.
- To do the change from release to release, at least the encryption key of the latest deployment and the new one should be configured.
6 - Generate an APIKey in Aura
Generate an APIKey in Aura
Methods for the generation of an APIKey in Aura
Introduction
All Aura’s public APIs are protected using an APIKey.
The generation of an APIKey can be done using two alternative processes:
Generate an APIKey using the aura-api-key-generator utility
These guidelines correspond to the process that uses the aura-api-key-generator utility as a Docker image.
Prerequisites
- Docker 23.0.5 or higher
- Access to
auraregistry.azurecr.io private docker registry.
- The
ENCRYPTION_KEY of the environment where the APIKey will be used:
-
kubectl installed in your local host.
-
curl installed in your local host.
-
jq installed in your local host.
-
To obtain the ENCRYPTION_KEY, just execute the following command:
# substitute {{aura-environment}} with the environment you're configuring
export AURA_ENVIRONMENT={{aura-environment}}

$ kubectl -n $AURA_ENVIRONMENT get secret aura-bot -o json | jq -r ".data.AURA_ENCRYPTION_KEY|@base64d"

YOUR-ENCRYPTION-KEY
Download the Docker image and run the tool by executing the following command:
# Substitute {{aura-encryption-key}} with the ENCRYPTION_KEY obtained in the previous step
$ docker run -e AURA_ENCRYPTION_KEY={{aura-encryption-key}} auraregistry.azurecr.io/aura/aura-api-key-generator:1.0.0 -v 8.3.0 -s aura-services -a kernel -m rw
Usage
> @telefonica/aura-api-key-generator@1.0.0 start
> node lib/index.js --help

process.env.CONFIG_FILE (undefined) not found or not configured, using only process.env

Usage: index -s aura-services:token -e pre -a kernel -v 8.3.0 -m rw

Utility to generate API Key to access the APIs of Aura.  Version: 1.0.0.

Options:
  -V, --version                     Output the version number
  -i, --identifier [identifier]     Unique identifier of the APIKey. Format UUID. If not provided, it will be autogenerated
  -s, --scope [scope]               Comma-separated list of strings containing the API path where this APIKey will be used. Possible values: "aura-services", "aura-services:users,aura-services:token", "aura-services:whatsapp", etc. (By default: "aura-services")
  -e, --enviroment <enviroment>     Environment where the APIKey will be used. Possible values: dev, stg, pre, pro (Choices: "dev", "stg", "pre", "pro". By default: "pro")
  -a, --authorised <client>         Name of the client that will use the APIKey. Usually one of kernel, novum, mh, mp, stb, la, etc. (By default: "kernel")
  -v, --aura-version <auraVersion>  Minimum Aura Platform version to use this APIKey. It should contain the full version of Aura. Example: 8.3.0 (default: "8.3.0")
  -m, --mode <mode>                 Type of access to the API. Possible values: r, w, rw (Choices: "r", "w", "rw". By default: "r")
  -h, --help                        Display help for command
Scope
All public Aura’s APIs are in the aura-services scope, so any APIKey generated with this scope will have access to all Aura’s APIs. But the idea is to use always the minimum scope valid for the specific usage of the client.
For example:
- For those clients that are Aura channels and need to get a Direct Line token from Aura, the scope must be
aura-services:token.
- To configure the WhatsApp webhooks of aura-bridge in Kernel, the scope must be
aura-services:whatsapp.
- To configure the access from Kernel to
aura-services API, the scope must be aura-services:users.
- To configure the access from Kernel to aura-gateway-api in
aura-services API, the scope must be aura-ai-services:messaging:write or aura-ai-services:nlp-messaging:write.
Environment
As the specific environment is configured via the ENCRYPTION_KEY, the environment parameter is only used to generate the APIKey with the correct environment name.
The environment name is used to validate the APIKey when it is used to access an API. It only contains the type of the environment: dev, stg, pre or pro.
Authorized
It should contain a human-readable name of the client that will use the APIKey. The usual values are: kernel, novum, mh, mp, stb, la, metaverse.
API Version
It contains the major version of the Aura API that the APIKey will be used.
For example, if the APIKey will be used to access the aura-services API, the API version must be 1. It must be coherent with the version of the API published in Aura’s API documentation.
Mode
It indicates the type of access to the API:
r: read-only access, it allows to access the API to execute GET operations.w: write-only access, it allows to access the API to execute POST, PUT and DELETE operations.rw: read-write access, it allows to access the API to execute GET, POST, PUT and DELETE operations.
7 - Migrate Aura Groot context database (Dire Straits)
Migrate Aura Groot context (Dire Straits)
Guidelines for the migration of aura-groot database context schema from releases previous to Dire Straits to Dorian release onwards. Additionally, the rollback procedure is included.
Prerequisites
Process for context DB migration
Access MongoDB console
To access and open MongoDB console we can use the kubectl command below to export the intended environment, with MongoDB adminuser password. Use the right environment and database name in the commands.
$ export ATLAS_DEPLOYMENT_NAME=aura-br-pro-70 # Get from kubectl get -n aura-system atlasdeployments.atlas.mongodb.com
$ export ATLAS_DATABASE_NAME=aura-groot-br-pro # Set with the correct DB of your deployment
$ export MONGODB_USER=$(kubectl get -n aura-system atlasdatabaseusers.atlas.mongodb.com mongodb-adminuser-password -o jsonpath='{.spec.username}')
$ export MONGODB_PASSWORD=$(kubectl get -n aura-system secret mongodb-adminuser-password -o go-template='{{ .data.password | base64decode }}')
$ export MONGODB_URI="$(kubectl get -n aura-system atlasdeployments.atlas.mongodb.com $ATLAS_DEPLOYMENT_NAME -o jsonpath='{.status.connectionStrings.standardSrv}'|sed "s|srv://|srv://$MONGODB_USER:$MONGODB_PASSWORD@|g")/${ATLAS_DATABASE_NAME}"
$ kubectl -n aura-system run fix-script -i -q --rm --restart=Never --image=mongo:latest --command mongosh ${MONGODB_URI}
Migrate context collection to new schema
Rollback to the previous schema
8 - Purge expired aura-users
Purge expired Aura users
Guidelines for the elimination of expired Aura users, in order to minimize the number of documents in aura-users database. This will make data migration lighter.
Prerequirements
-
This step must be executed if the number of documents in the aura-users database is too large and there are a lot of expired users, i.e., users that accessed more than 6 months ago and did not come back to Aura for a time.
-
It must be executed on a weekly or monthly basis to avoid long executions. The frequency will depend on the amount of data in your database and how long it takes to remove the expired data.
-
A valid kubeconfig for the environment must be available
-
A valid token to be able to pull images from aura docker registry: auraregistry.azurecr.io must be available
-
Get the variables to access the database:
# substitute {{aura-environment with the environment you're configuring }}
export AURA_ENVIRONMENT={{aura-environment}}

$ kubectl -n $AURA_ENVIRONMENT get cm authentication-api -o json | jq -r ".data.AURA_MONGODB_URI"

{{mongo_uri}}

$ kubectl -n $AURA_ENVIRONMENT get cm authentication-api -o json | jq -r ".data.AURA_MONGODB_USERNAME"

{{mongo_user}}

$ kubectl -n $AURA_ENVIRONMENT get secret authentication-api -o json | jq -r ".data.AURA_MONGODB_PASSWORD|@base64d"

{{mongo_pass}}

$ kubectl -n $AURA_ENVIRONMENT get cm authentication-api -o json | jq -r ".data.AURA_MONGODB_USER_DB"

{{mongo_users_db}}
Process for expired users elimination
Access MongoDB console
This access depends on the deployment configuration:
-
If the environment database runs in an on-premise MongoDB server, set up the corresponding port-forward to the primary node of the replicaset:
# Review carefully the mongodb pod you're connecting to, it MUST be the primary of the replica set
# Review your local port carefully, to set a free one

$ kubeclt -n aura-system port-forward mongodb-0 27017:27017

# Set the proper mongo_uri to access via the port-forwarded connection
$ mongo_uri=mongodb://localhost:27017
-
If the environment database runs in Atlas, just connect to the {{mongo_uri}}, read from the environment configuration.
In the end, just open the MongoDB console:
$ mongo -u {{mongo_user}} -p {{mongo_pass}} {{mongo_uri}}

> use {{mongo_users_db}}
Check the number of expired users
⚠️ If Movistar Plus is a valid channel in your deployment, then its users must not be considered in the query, because they are created from a backend and are assumed to be created beforehand.
> db.users.find({ "$and": [ { "$or": [ { "lastAccess": { "$exists": false }},{ "lastAccess": { "$lt": new Date(ISODate().getTime() - 1000 * 86400 * 180)} } ]}, { "channelId": { "$ne": "60f0ffda-e58a-4a96-aad9-d42be70b7b42" }} ]}).count()
The script iterates over all the users in the database, deleting those whose lastAccess is older than 180 days or without lastAccess field (meaning that they come from an old version of Aura where this field does not exist).
It will create some output files with the deleted users that can be used with mongoimport command to restore the deleted users, if needed. The output files with the deleted users will be split in files of 500Mb size each.
If the environment uses MongoDB on premise:
Use with port-forwarding to the primary node of the cluster in the same host where the command is running:
# complete the {{mongodb_uri}} with the user and password of the database. You should obtain something like:
# mongodb_full_uri = mongodb://{{mongo_user}}:{{mongo_pass}}@{{mongodb_hosts_path}}

$ docker run -it --net=host -e MONGODB_USERS_DATABASE={{mongo_users_db}} -e MONGODB_URI={{mongodb_full_uri}} -v $(pwd)/output:/opt/cleaner/output auraregistry.azurecr.io/aura-tools/database-cleaner
9 - Aura Continuous Integration
Aura Continuous Integration
Find in this section key information related to Aura’s Continuous Integration system
Introduction
Aura uses Jenkins as CI orchestrator, mainly by the use of Jenkinsfiles with some internally developed libraries.
Our Jenkins runs in DCIP instance.
Access to these documents to find key information regarding:
9.1 - Basic jenkins configuration
Basic Jenkins configuration
Discover the basic Jenkins configuration
Introduction
Aura uses Jenkins as continuous integration (CI) tool. In particular, the in-house installation in DCIP.
Configuration
Prerequirement: administrative access to Github repository and to dcip are must.
-
In the Github web of your repository, go to Settings and to Webhooks, as can be seen in the following picture:
-
Click on Add webhook, the following window will be shown:
- Fill the URL of the webhook and its content type format
- Choose
Let me select indivial events and select only Pull requests. Remember to uncheck Pushes that’s checkec by default.
- Set the webhook as
Active and click on the Add webhook button to save the configuration.
Jenkins jobs
ℹ️ Prerequirement: administrative access to dcip is a must.
-
First thing is to create a new set of Jenkins jobs for your brand new respository, so from the main aura
Jenkins page, you should run _component-setup job.

-
Choose Build with parameters and fill the data of your repository in this case aura-bot-platform.
Remember to use ssh as repository URL.
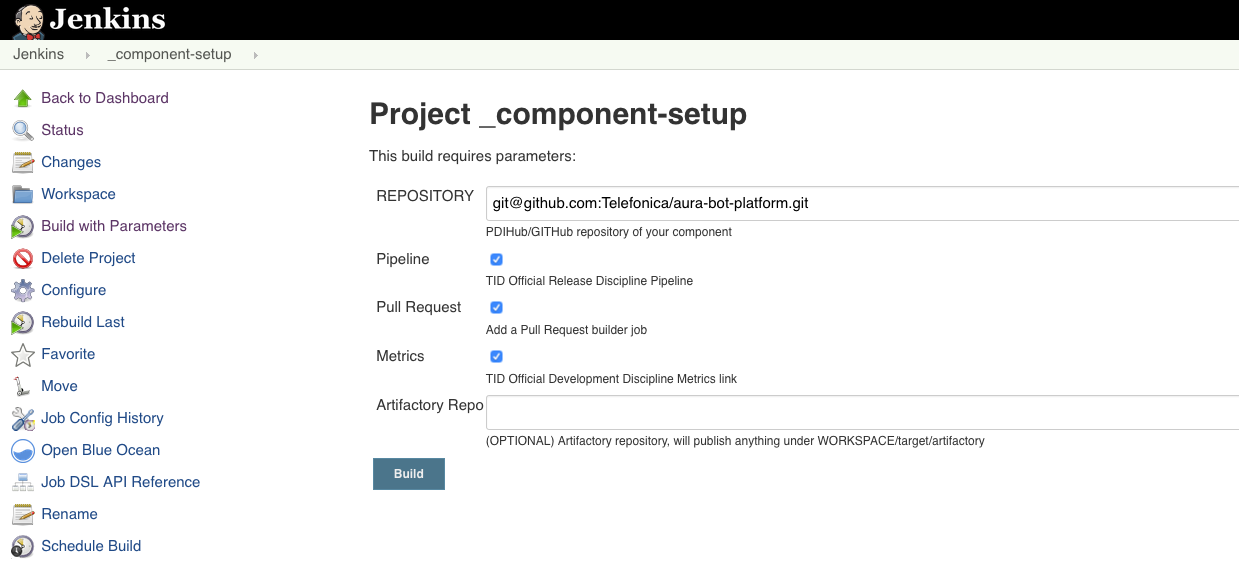
This job will generate a new set of jobs specific for the current repository and with its very same name.
Generate a dedicated slave to run these jobs
Add a Dockerfile to the root of your repository (follow the one in aura-bot-platform). In this case, a new slave definition is needed to run the jobs with a node10 docker container.
To build it, just build the job _docker-slave-setup with parameters:
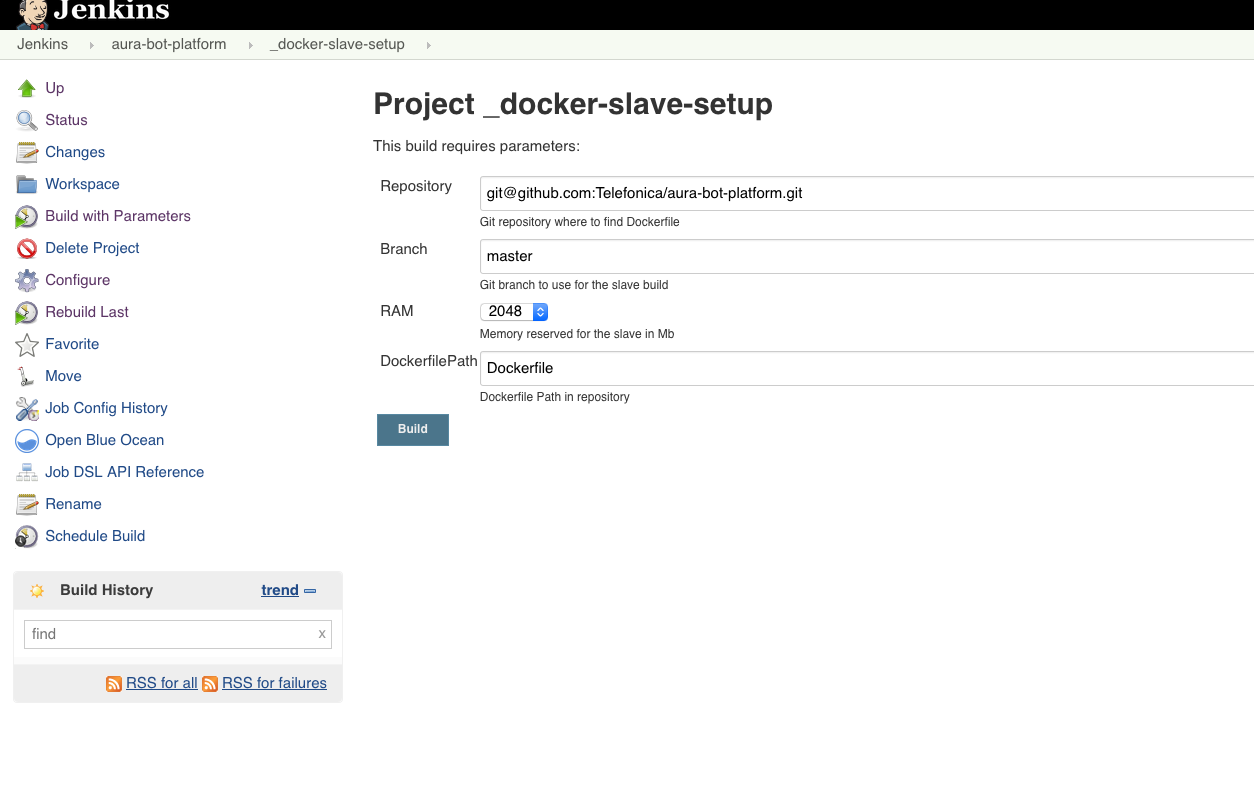
This will generate automatically the job _docker-slave-builder that will process, configure and publish a docker image based on the provided Dockerfile. Slaves using this image will be available under the label repository-name, in this case: aura-bot-platform.
Build PR job
This is one of the automatically jobs generated by the _component-setup job. It will run whenever a Pull Request is requested in the repository, if it counts on the corresponding webhook.
The basic configuration provided automatically is OK, but in Aura we should apply a couple of changes to handle it properly:
-
Check Restrict where this project can be run and write the just created aura-bot-platform labeled slaves.
-
To access github, select the already available credentials (usually contint (contint user for GITHub/PDIHub)).
-
A couple of environment variables should be configured:
NPM_TOKEN: it should be added in “Build Environment” section, binding a secret text, with the specific credential.DOCKER_HOST: it should be added in “Build Environment” section, binding a secret text, with the specific credential.
-
The next step is to include execution of the existing delivery/pipelines/pr.sh script during the building phase of the job.
- In Build section, just add an
Execute shell step with the following content, depending on the project, further variables should be needed:
#!/bin/bash
set -e
export DOCKER_HOST=${DOCKER_HOST_VM}
git remote set-url origin git@github.com:Telefonica/aura-bot-platform.git
delivery/pipelines/pr.sh
9.2 - Jenkins pipelines definition
Jenkins pipelines definition
Understand how the Continuous Integration system works in Aura system in detail
Introduction
During the refactor phase, the way to declare the configuration of the different repositories has been redefined by trying to simplify the delivery/pipelines/Jenkinsfile file statement.
The main objective of the refactor is “to simplify”. This is attempted to achieve as follows:
- All repositories must execute the same stages (predefined).
- Repositories with a specific language should execute the same tasks in stages.
- Scripts to execute tasks should be common and defined in jenkins-libraries-aura repository to be reused.
General structure project
The files associated with the continuous integration system are found in the delivery folder, which has the following structure:
delivery/
├── docker                          # Folder to Dockerfile
├── pipelines/Jenkinsfile.aura      # Jenkinsfile
└── scripts                         # Utility script for pipelines
Scripts added to the delivery/scripts folder should be specific tasks for this repository. Otherwise, the scripts should be in the resources/org/aura/script folder and that can be reused.
Add script to delivery/scripts only if it is completely necessary.
Jenkinsfile example
@Library(['aura']) _

auraPipeline {
    language = 'node'
}
The previous definition is sufficient for a nodeJS type repository to execute the default continuous integration tasks defined for an Aura nodejs project.
Definition of pipelines
Common libraries
Although it is possible to directly define the tasks to be executed with groovy here, there are a number of predefined scripts to run common tasks that can be used by including the aura and devops libraries:
@Library(['aura','devops']) _
Pipeline configuration
auraPipeline {
    slave,          // Slave where pipeline will be executed. Default: 'aura-bot-platform-14'
    nature,         // Pipeline nature: Default: 'standard' (the refactor nature)
    language,       // Language used by the pipeline
    artifacts,      // List of artifacts that need to be generated.
    stages,         // List of stages. Default: default stages
    modifiedStages, // List of modified stages.
    options,        // Pipeline options.
    postJobs        // Post execution jobs.
}
slave property
Slave property indicates the slave where Jenkins stages will be executed.
If a slave is not specified explicitly, aura-bot-platform-14 will be finally used.
nature property
The nature property indicates the definition of pipeline that will be executed on the list defined in ‘jenkins-libraries-aura’ project.
The simplification in the definition of pipelines has reduced the list to a single generic pipeline defined as standard.
It is still possible to execute existing pipelines, previous to refactor. Simply, the value of nature should indicate the pipeline to be executed.
This is deprecated in favor of the new standard pipeline.
language property
The language property helps the standard pipeline to execute the appropriate tasks depending on the language of the repository itself.
The system is prepared to handle repositories whose source code is written in a single main language.
artifacts property
List of artifacts that will be generated.
stages property
Although the standard pipeline defines a series of default stages depending on the type of ‘push’ that is done on the repository, this field allows you to define the stages manually.
modifiedStages property
In some cases, it is necessary to modify the configuration of some default stage in standard pipeline, without defining all the stages again (as we would do on the stages property).
For example, we can modify the test stage for the ‘pr’ type:
modifiedStages = [
    'pr': [
        new Stage(name: 'test', description: 'Test', options: [ skipLint: true] )
    ]
]
or modify the test stages for all types (pr, release, etc):
modifiedStages = [
    '*': [
        new Stage(name: 'test', description: 'Test', options: [ skipLint: true] )
    ]
]
options property
The following options are available:
| Option |
Description |
type |
Default |
| deleteBuildOnSkip |
Delete build on skip |
boolean |
true |
| uploadGeneratedArtifacts |
Upload generated artifacts from ‘artifacts’ directory |
boolean |
false |
postJobs property
Jenkins jobs that will be executed once the current job ends.
Defining artifacts
The artifacts are components that we can generate during the execution of the pipeline. All artifacts must extend from the Artifact class and depending on its type will generate one component or another.
Currently, there are only two types of components (although it can grow in the future): AuraComponent and AuraLibrary.
A type component AuraComponent is used to generate a Docker image with the following configuration options:
| Option |
Description |
type |
Default |
| name |
Component name |
String |
|
| version |
Version for the docker image |
String |
|
| envVersionVar |
Environment version variable (as AURA_BOT_VERSION) |
String |
|
| scripts |
List of names of configuration scripts |
List |
|
| initScripts |
List of names of initialization scripts |
List |
|
| buildArguments |
Docker build arguments |
List |
|
| dockerImageName |
Docker image name |
String |
|
| dockerFile |
Docker file name |
String |
‘Dockerfile’ |
| dockerPromotionTag |
Docker promotion tag |
String |
’latest’ |
Example:
    artifacts = [
        new AuraComponent(
            name: "aura-bot",
            version: "\$BOT_UC_VERSION",
            dockerImageName: "aura/aura-bot-uc",
            dockerFile: "Dockerfile",
            scripts: ["librariesListFile.sh", "cfBotPlatformVersion.sh"],
            buildArguments: ["BOT_BASE_VERSION=\$BOT_BASE_VERSION", "UC_VERSION=\$UC_VERSION", "UC_REVISION=\$PRODUCT_REVISION"]),
    ]
A type component AuraLibrary is used in repositories containing several libraries (multi-repository). In this way, it is possible to execute the pipeline for each of the libraries defined in the list of components.
If a multi-repository follows the structure of adding each library within the “packages” directory, the stages in standard pipeline are able to automatically get the library list, so in most cases it is not necessary to define configuration by hand.
In case you need to define the library list, the following options are available:
| Option |
Description |
type |
Default |
| name |
Component name |
String |
|
| path |
Component path (Ex. packages/my-library) |
String |
|
| versionStrategy |
Version strategy: distag, old |
String |
distag |
Example:
    artifacts = [
        new AuraLibrary( name: "aura-json-schema-generator", path: "packages/aura-json-schema-generator")
    ]
How to define my own stages?
The standard pipeline defines the following stages by default:
// Default stages
'default': [
    'pr'     : [
        new Stage(name: 'decrypt', description: 'Decrypt'),
        new Stage(name: 'initialization', description: 'Initialization'),
        new Stage(name: 'build', description: 'Build'),
        new Stage(name: 'test', description: 'Test')
    ],
    'release': [
        new Stage(name: 'checkSkip', description: 'Checkout skip'),
        new Stage(name: 'decrypt', description: 'Decrypt'),
        new Stage(name: 'initialization', description: 'Initialization'),
        new Stage(name: 'build', description: 'Build'),
        new Stage(name: 'test', description: 'Test'),
        new Stage(name: 'versioning', description: 'Versioning'),
        new Stage(name: 'publish', description: 'Publish'),
        new Stage(name: 'promote', description: 'Promote'),
        new Stage(name: 'deploy', description: 'Deploy')
    ]
]
Although the standard pipeline supplies the previous list of stages by default, it is possible to define stages manually, indicating in the repository that stages will be executed for each type.
There are two different ways to do this:
-
Modify or add stages on the standard pipeline. For this you must use the modifiedStages property. If a stage is defined with the name of an existing one, it is becoming overwritten. In case the added stage has a name different from the existing default stage, the new stage will be added in the execution.
-
Refine completely the list of stages to be executed. As indicated above in the options, the stages property allows you to define the list of stages that will be executed.
Example to execute only the test stage in the ‘pr’ type:
stages = [
    'pr': [
        new Stage(name: 'test', description: 'Test')
    ]
]
What tasks are executed for each stages?
Each Stage executes a series of task based on the value of the language property.
Node
| Stage |
Description |
| checkSkip* |
Perform a check to know if it can do skip of the build. |
| decrypt* |
Decrypt files that need it. |
| initialization |
Gets versions for AuraComponent type artifacts. |
| build |
Run node/build.sh script for all Library type components (the scripts can get libraries automatically). |
| test |
Run node/test.sh script for all Library type components (the scripts can get libraries automatically). After execution, reports are generated for: Test, Coverage and LiNT. |
| versioning |
Run node/versioning.sh script for all Library type components (the scripts can get libraries automatically). |
| publish |
If the onlyPack option is added, the npmPack.sh script will be executed. Otherwise, the publish.sh script will be executed. |
| promote* |
For each AuraComponent type artifact performs a docker tag and push command |
| deploy* |
For each AuraComponent type artifact performs a deployment for the component |
The value * at the end of stage’s name indicates that it is a default stage and it has not been modified for the node language.
Scripts used in the execution process for the node language:
node
├── build.sh        # Execute "npm install".
├── npmPack.sh      # Execute "npm install", "npm pack" and move the generated packages to the _artifacts_ folder.
├── publish.sh      # Check if it is not published and runs "npm install" and "npm publish".
├── test.sh         # Execute "npm run coverage-jenkins" and "npm run lint-jenkins".
└── versioning.sh   # Detects changes in the library to increase version (only if publishConfig exists in package.json)
9.3 - Repositories configuration file
Repositories configuration file: aura-config.json
The purpose of the aura-config.json file is to provide a description of the repository to make it easier for releases and CI flows to manage each repository
Description
The aura-config.json configuration file can be created at the root of each Aura project to specify configuration that can be used to automate tasks.
Structure
Sections
{
    "release": {
        // Release information
    },
    "docs": {
        // Information associated with documentation (for example aura-docs)
    }
}
Fields
| Field |
Type |
Description |
| name |
string |
Library or package name |
| description |
string |
Library or package description |
| multiRepository |
boolean |
In deployment tasks, it is used to know if the project contains other projects (packages) |
| release.name |
string |
Current release name . It can be used by projects like aura-release-manager to increase versions automatically |
| release.version |
string |
Current release version. It follows the https://semver standard and it can be used by aura-release-manager and jenkins to increase versions automatically |
Fields in bold are required
Visual example
{
    "name": "aura-bot-libraries",
    "description": "aura-bot-libraries contains all global libraries required in aura-bot.",
    "multiRepository": true,
    "release": {
        "name": "tasos",
        "version": "4.0.0"
    }
}
Interfaces
AuraConfig
/**
 * @interface AuraConfig
 * @description Interface to aura-config.json file
 */
export interface AuraConfig {
    /**
     * Library or package name
     */
    name: string;
    /**
     * Library or package description
     */
    description: string;
    /**
     * In deployment tasks, it is used to know if the project contains other projects (packages)
     */
    multiRepository?: boolean;
    /**
     * Release information
     */
    release?: AuraConfigRelease;
}
AuraConfigRelease
/**
 * @interface AuraConfigRelease
 */
export interface AuraConfigRelease {
    /**
     * Contains the current release name . It can be used by projects like aura-release-manager
     * to increase versions automatically
     */
    name: string;
    /**
     * Contains the current release version. It follows the https://semver standard and it can be used by
     * aura-release-manager and jenkins to increase versions automatically
     */
    version: string;
}
Project using aura-config.json
| Project name |
Used configuration |
Used in |
| aura-bot-libraries |
release |
jenkins |
JSON Schema
aura-config.schema.json
10 - Event-watcher
Event-watcher
Description of the event-watcher component
Event-watcher description
event-watcher is a deployment responsible for the automatic update of the Keyvault Atlas key when it is rotated and a new version is created in the secret handled by the Atlas operator to keep it updated.
The event-watcher is running in aura-system namespace. This component watches for the events published into a Microsoft Storage account queue and updates the key in the secret handled by the Atlas operator to keep it updated.
This new configuration will create a new Event Grid System Topic resource in the common resource group.
11 - Use config-watcher
Use Config-watcher
Description and use of the config-watcher component
Config-watcher functionality
config-watcher is a deployment, continuously running in a persistent execution.
The objective of the config-watcher is to ensure that deployments are up to date with the most recent configuration adjustments.
To do this, this component gets the configuration from aura-configuration-api endpoints, configmaps or Azure Storage blobs and compares it with certain metadata added to the deployments/pods.
If the configuration is not synchronized, config-watcher will restart or call the endpoint of the pod to refresh its already loaded configuration.