This is the multi-page printable view of this section.
Click here to print.
Return to the regular view of this page.
Abacus 1.0.0.
Abacus 1.0.0. user guide
Learn how to use Abacus, the tool for the training, testing and certification of the NLP model in Aura through an agile and efficient process
What’s Abacus?
Abacus is a web tool that eases the management of understanding models in Aura. Using Abacus, you can get a higher efficiency and autonomy, leading to a more agile certification of your NLP trainings.
Linguists or NLP experts can use Abacus to train, test and certify a full NLP understanding model in a specific channel and verify that Aura is able to understand properly.
With Abacus, you can certify your NLP model in four steps:
- Upload my NLP training
- Train & test the full understanding model
- Live mode: Iterate and test
Check your accuracy and iterate your model
- Publish your model
Publish your branch in Github transparently
Limitations of Abacus version 1.0.0.
Abacus journey map
The following image shows the main steps in your process for using Abacus. Access the guidelines for each step in the following documents:
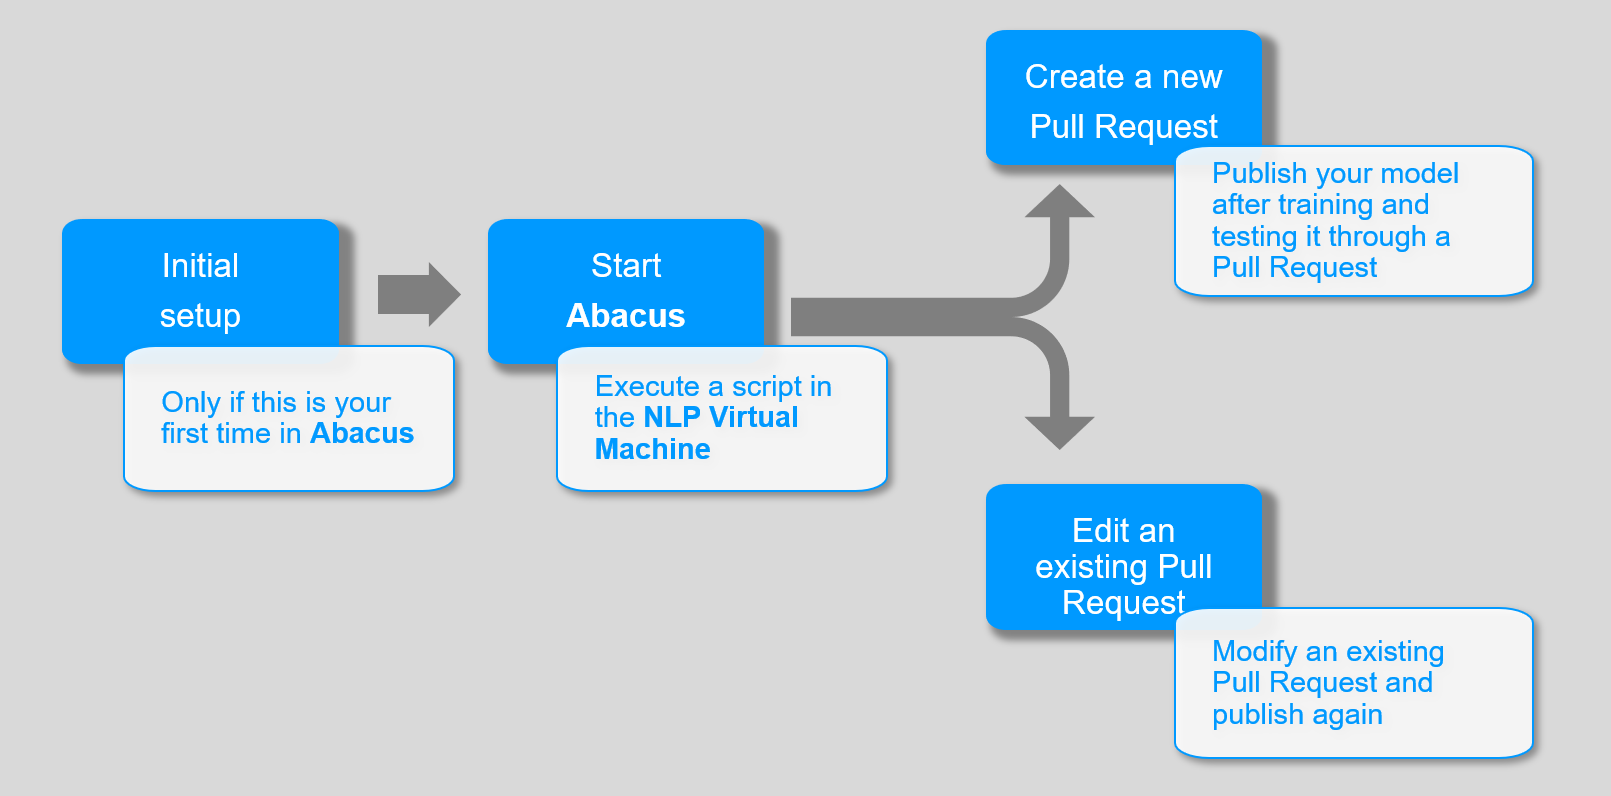
1 - Set-up Abacus
Abacus 1.0.0. initial set-up
Using Abacus for the first time? Follow these guidelines for its set-up.
⚠️ This process must be done only once, the firt time you open Abacus.
Prerequisites for using Abacus
Check that you fulfil these requisites before Abacus set-up.
-
You have the NLP Virtual Machine installed and working, with your aura-nlpdata working branch generated.
-
The understanding model is already defined and configured.
-
You have generated the specific training files and E2E test files required for each stage of your NLP pipeline.
-
You have already filled the variables required for training in the configuration file build_local_variables.sh.
Steps for Abacus set-up
-
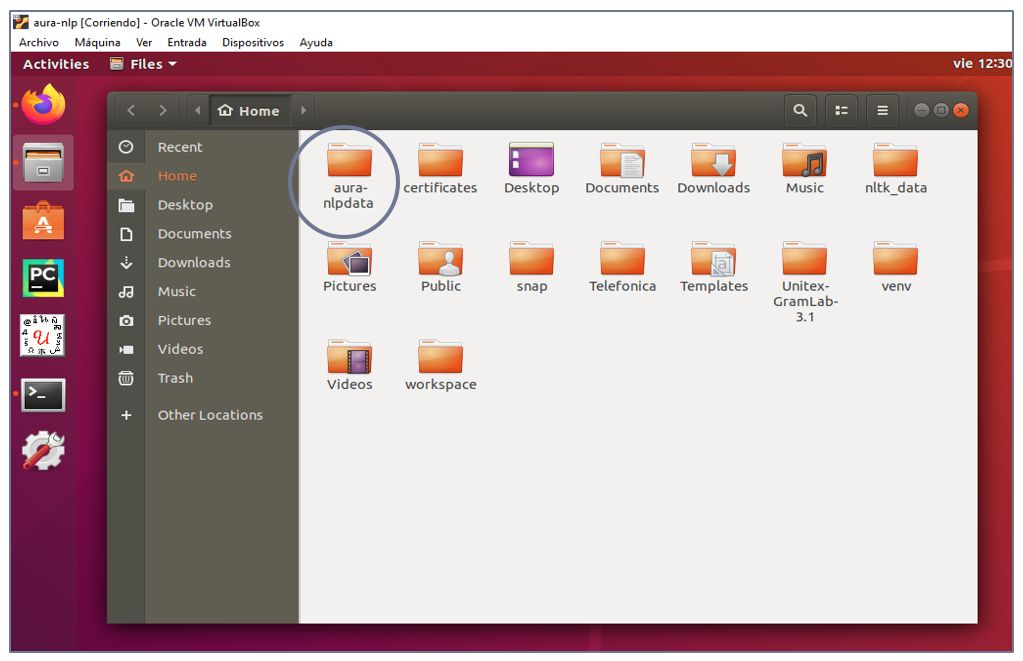
Access the NLP Virtual Machine.
-
Enter your local working project, henceforth {Root_project}, whose name should be:
aura-nlpdata-[country-code]
-
Copy the local variables configuration template:
"${Root_project}/tools/build_local_variables.sh.tpl"
and rename as:
"${Root_project}/tools/build_local_variables.sh"
cd ${Root_project}/tools
cp build_local_variables.sh.tpl build_local_variables.sh
-
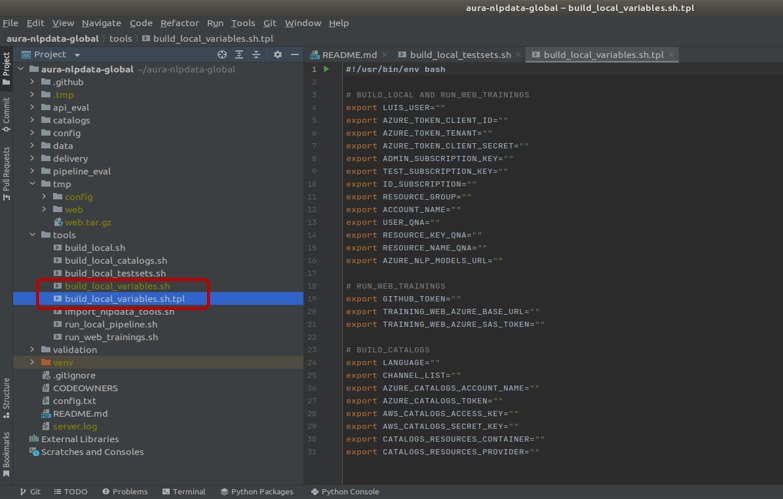
Access the file build_local_variables.sh in the tools/ folder.
-
Fill in the variables inside the “run_web_trainings” section:
-
Run the script file:
${Root_project}/tools/run_web_trainings.sh
-
When the script is finished, Abacus is opened automatically.
2 - Use Abacus
Guidelines for the use of Abacus 1.0.0.
After the Abacus set-up, learn how to use the tool with our guidelines.
Open Abacus
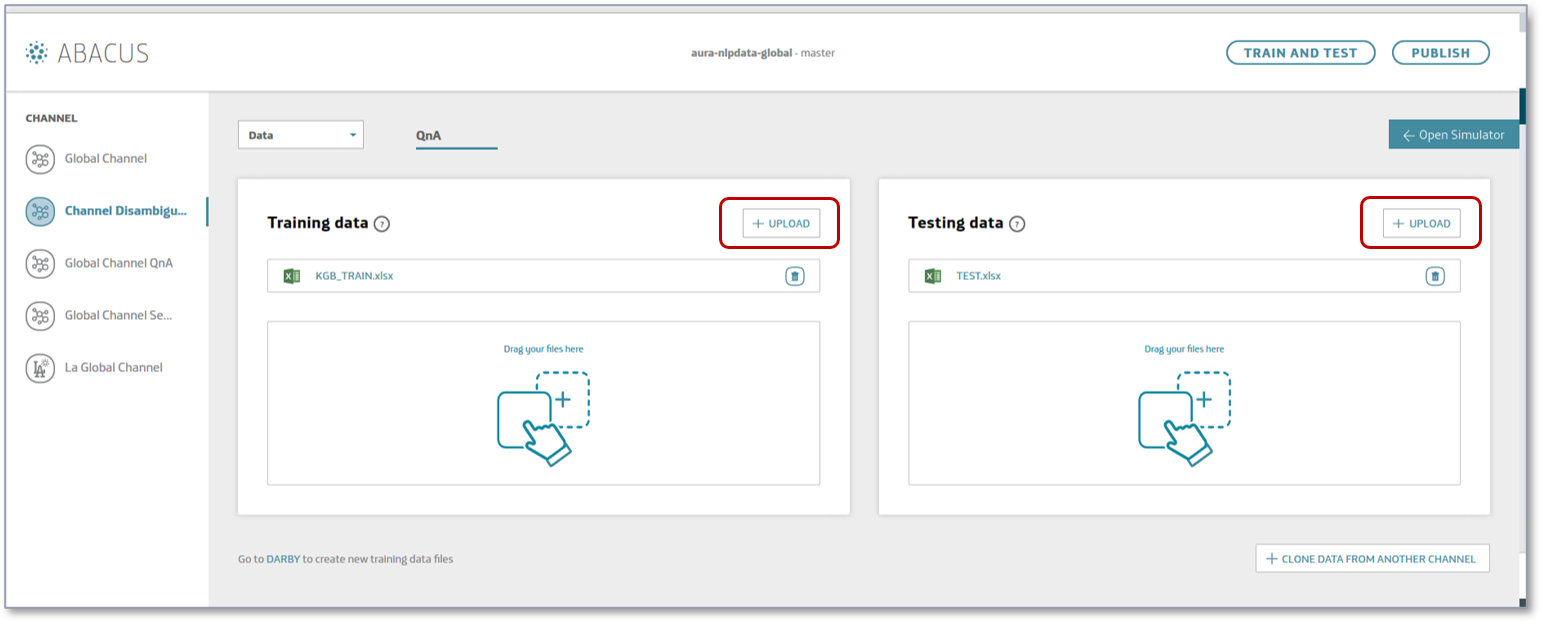
-
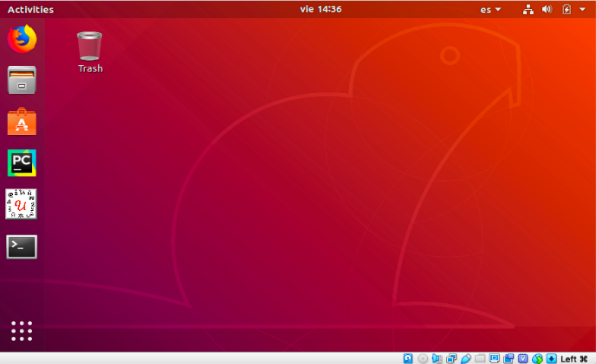
Open the NLP Virtual Machine.
-
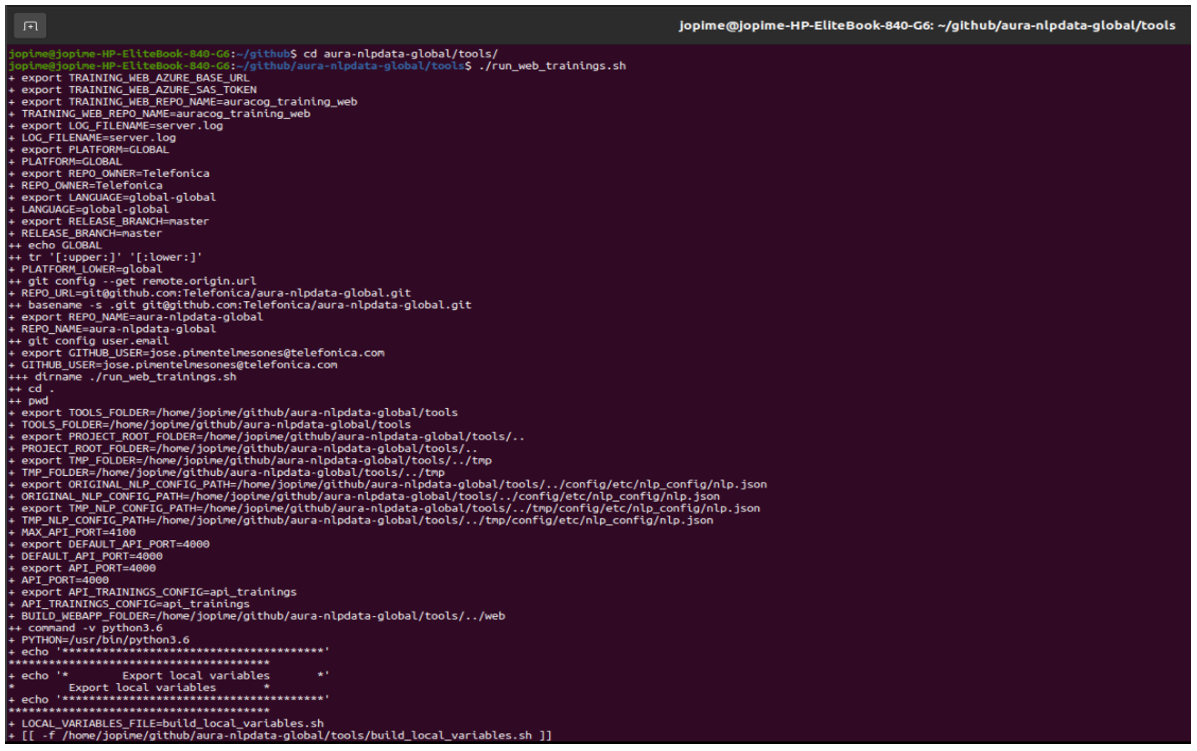
Execute the following commands in the console:
cd ${Root_project}/tools
./run_web_trainings.sh
-
Abacus is now opened.
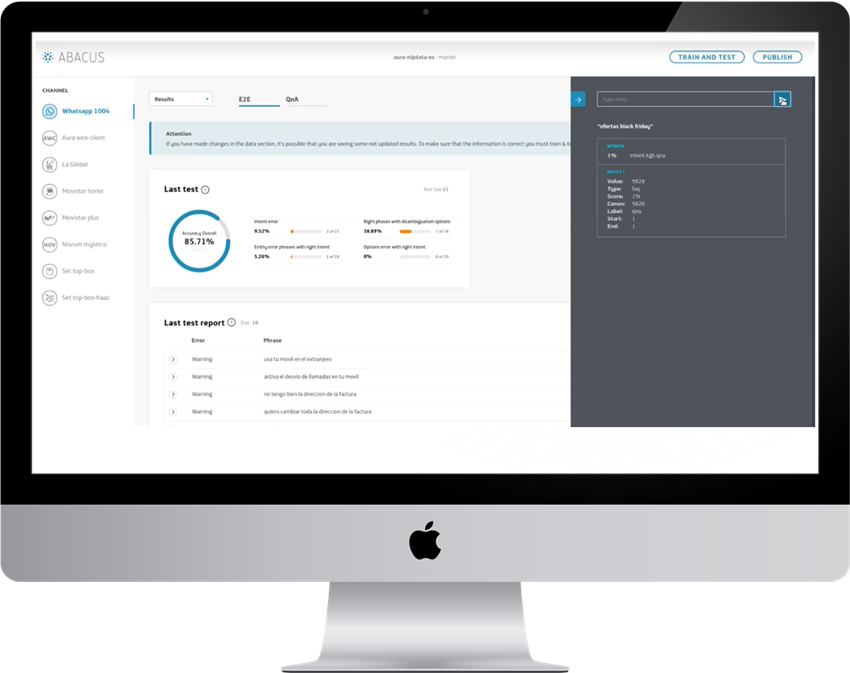
Discover Abacus main screen

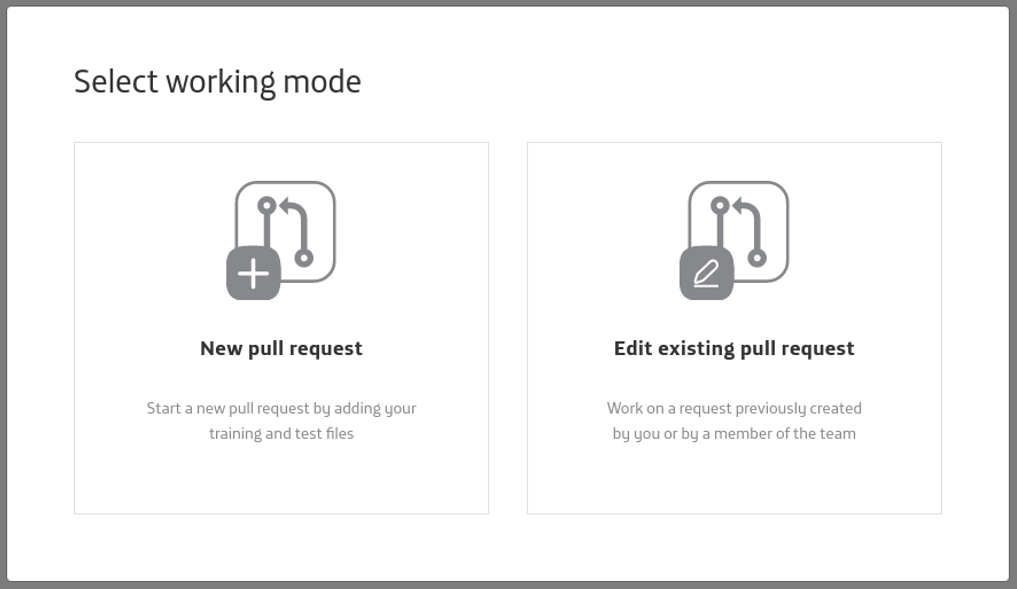
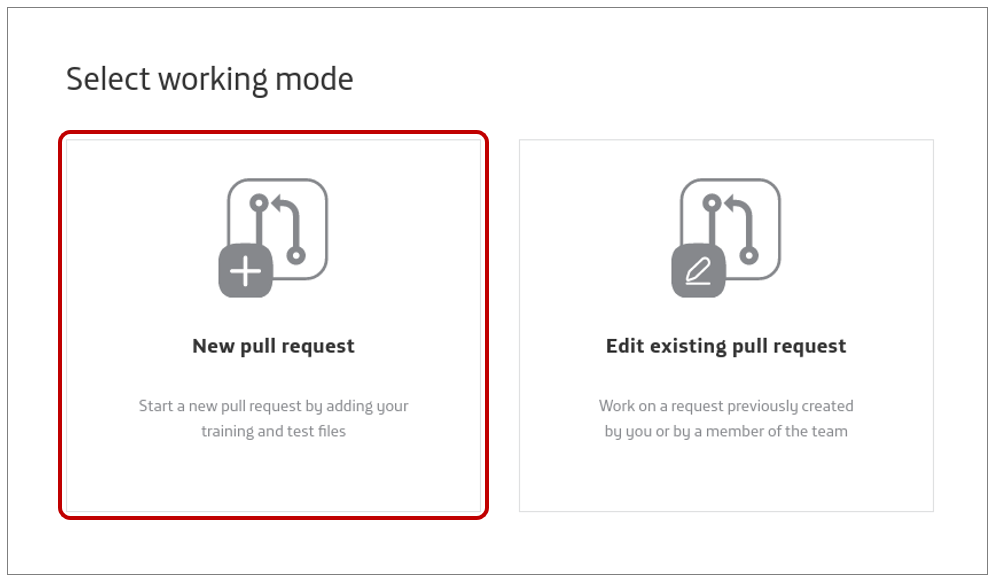
Create a new Pull Request
-
Enter Abacus and select “New Pull Request” as your working mode.
-
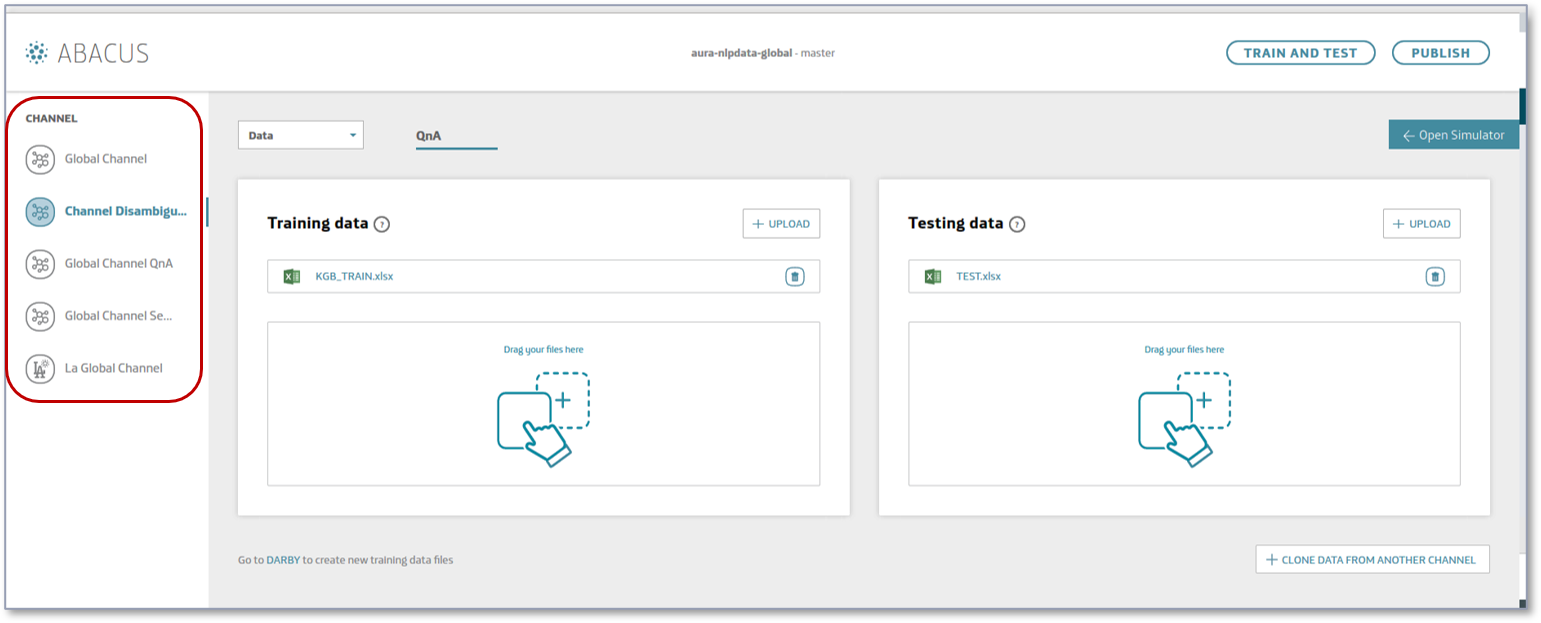
In the main interface, select the channel where your understanding model is.
-
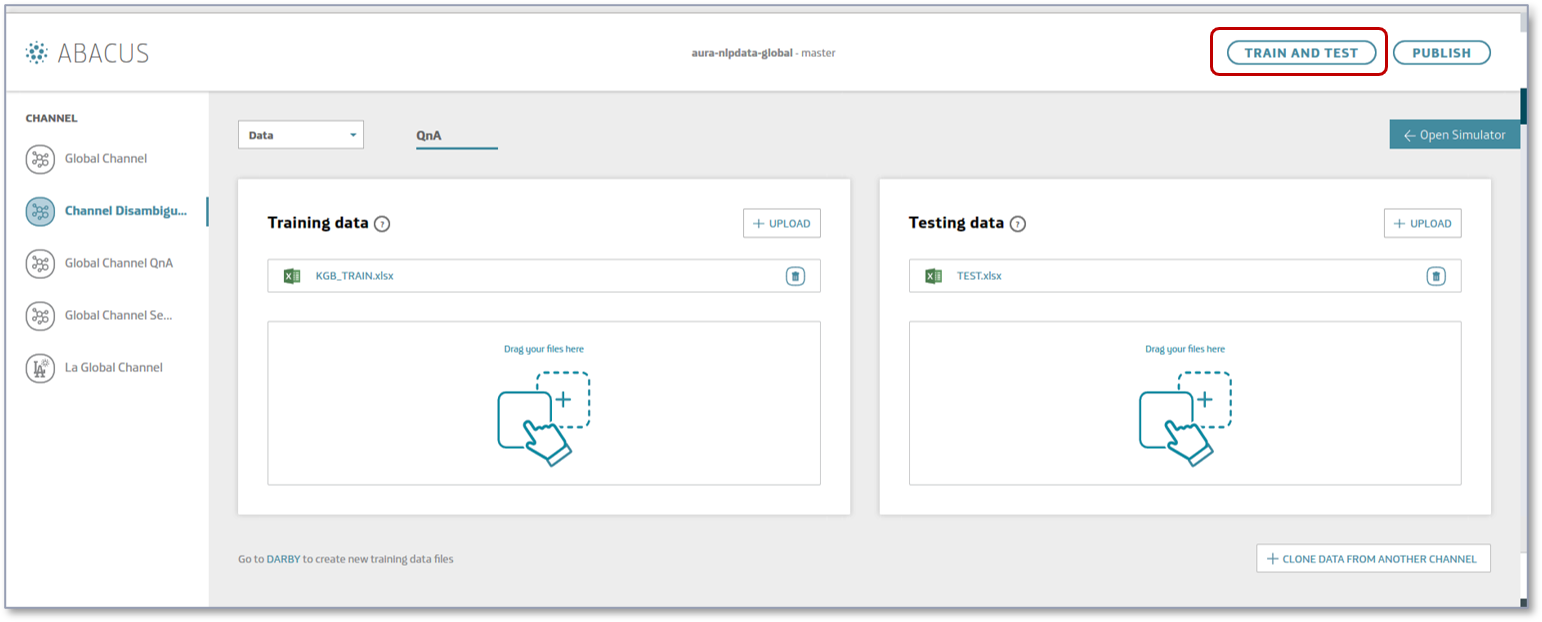
Train your understanding model.
-
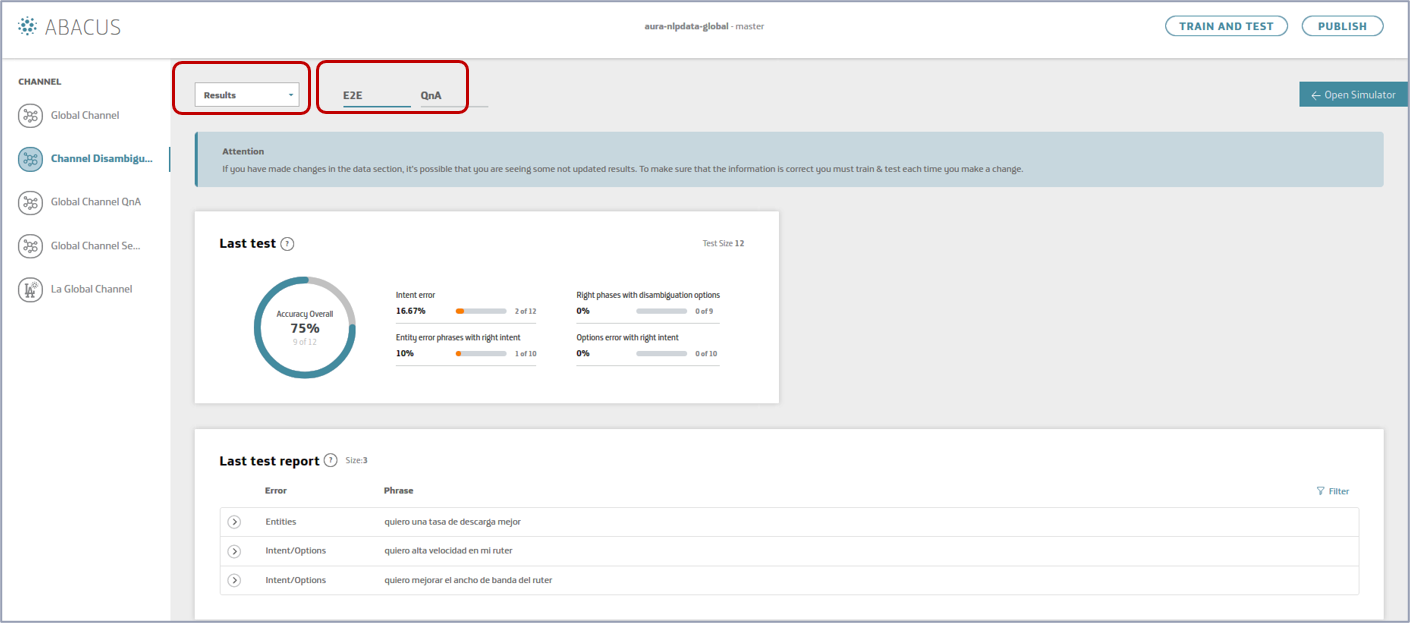
When the training is finished, select “Results” in the drop-down menu and access to the results of the accuracy tests.
- End-to-end tests (accuracy of the overall NLP model)
-
Evaluate the accuracy of your model:
-
Check in “last test” the overall accuracy related to the last test performed in the tool.
-
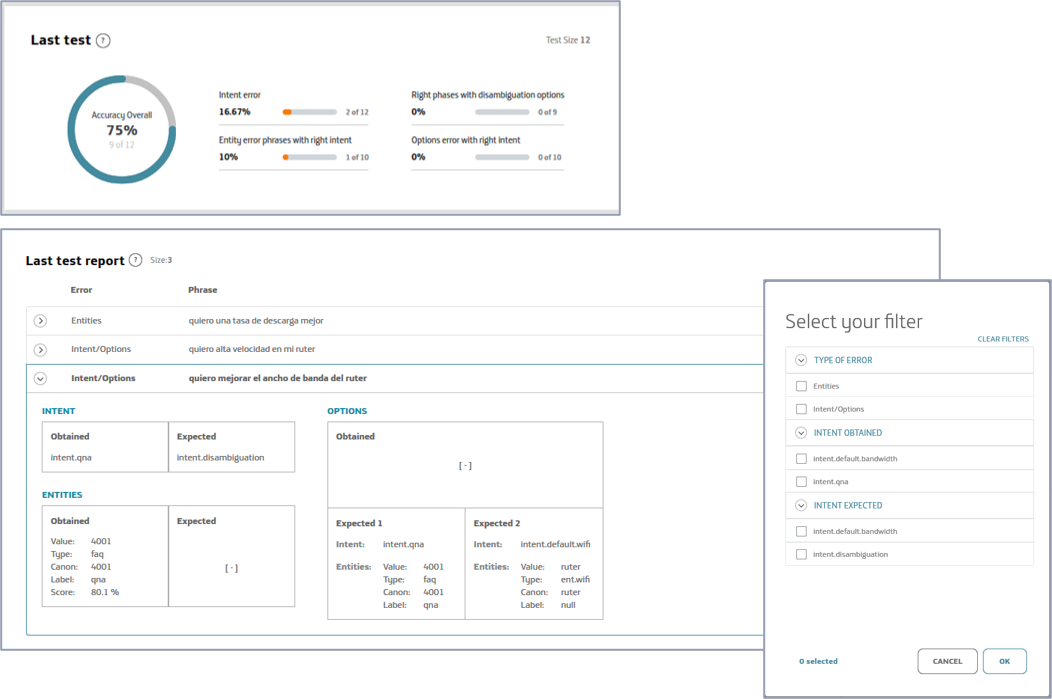
Click on each specific error in “last test report” to access to detailed information.
-
Use the filters to visualize errors per type, intent obtained or intent expected.
-
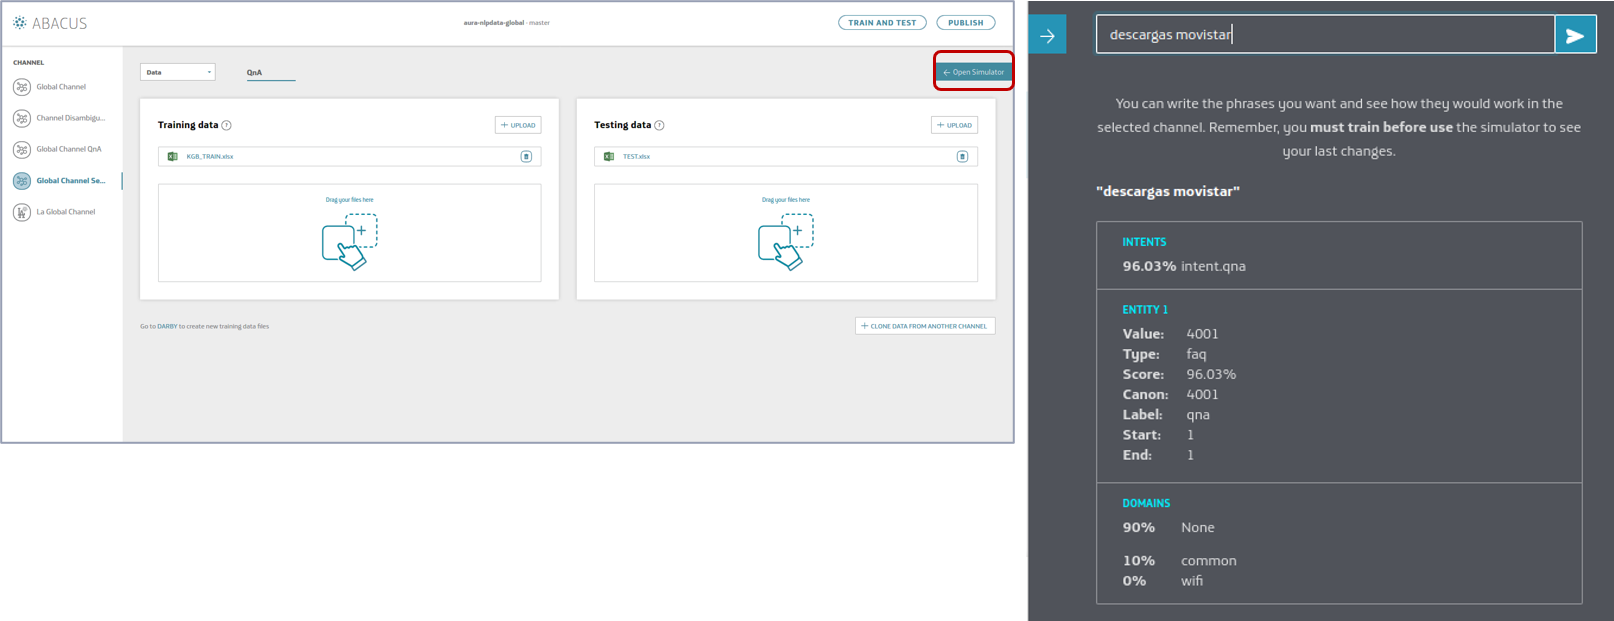
Test your NLP model locally (Abacus simulator).
Once your model is trained, you can use the Simulator to launch and test your pipeline locally and make a real-time evaluation of accuracy in the recognition of a specific statement.
- Open the simulator.
- Type a phrase.
- Check how your model recognizes it.
-
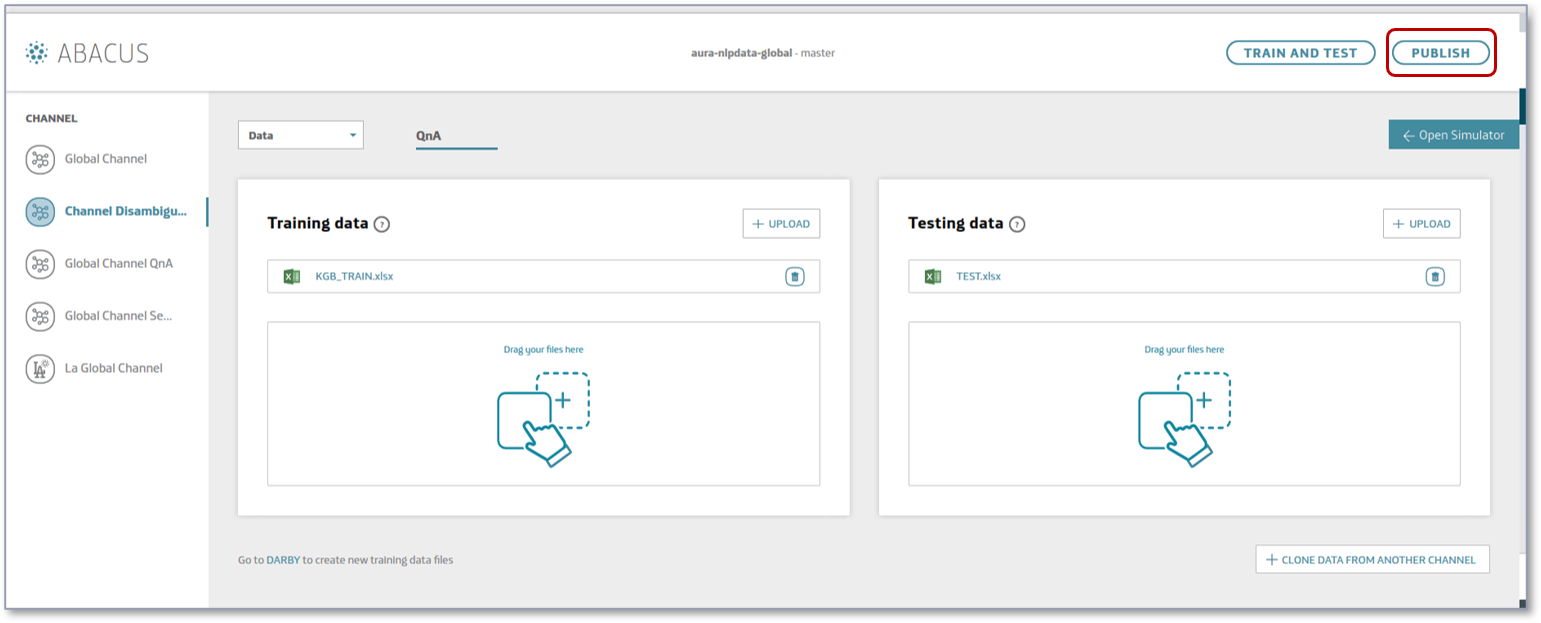
When the accuracy is satisfactory, publish your model:
-
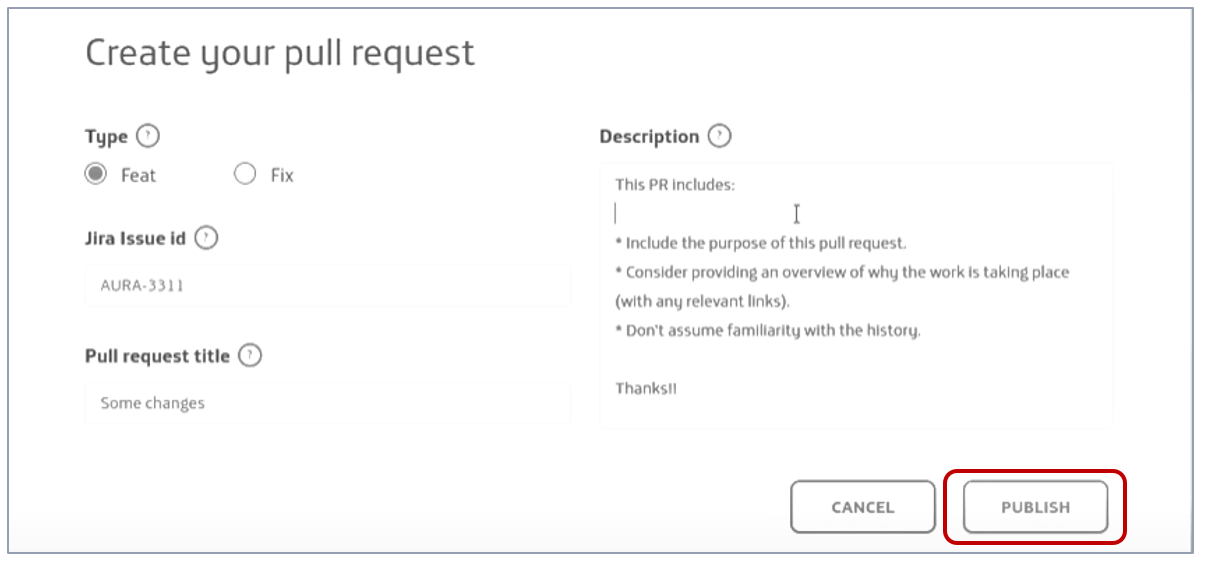
Press the “PUBLISH” button.
-
Create your Pull Request inserting the type, related JIRA issue, title and description and publish it.
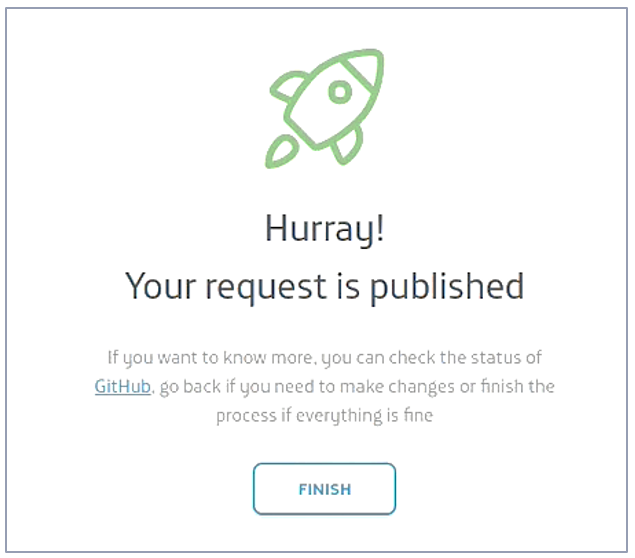
-
If everything goes right, your PR is published. You can also see the details in Github.
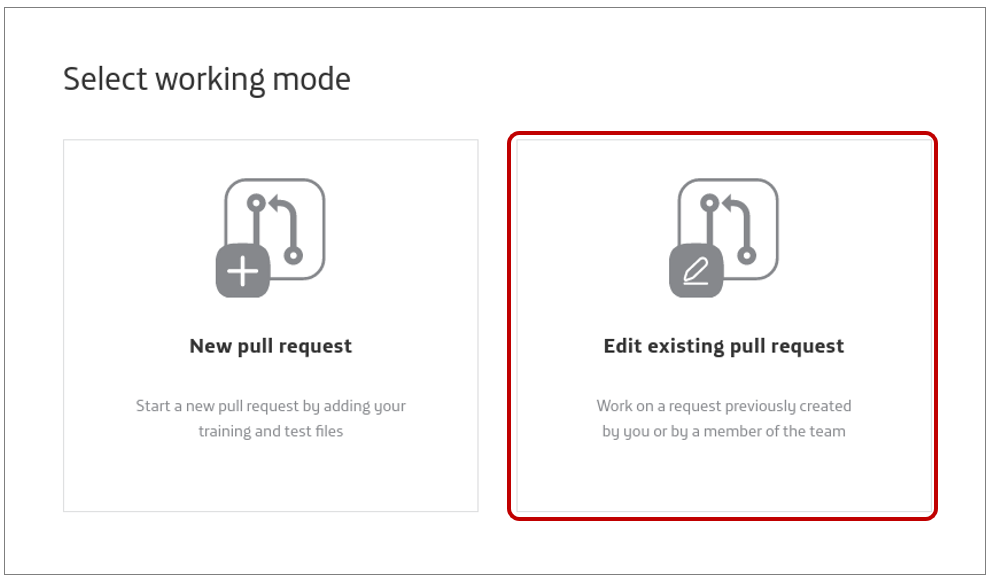
Edit an existing Pull Request
-
Enter Abacus and select “Edit existing Pull Request” as your working mode.
-
Select your intended Pull Request. You can open it from Abacus or from GitHub to see its details.
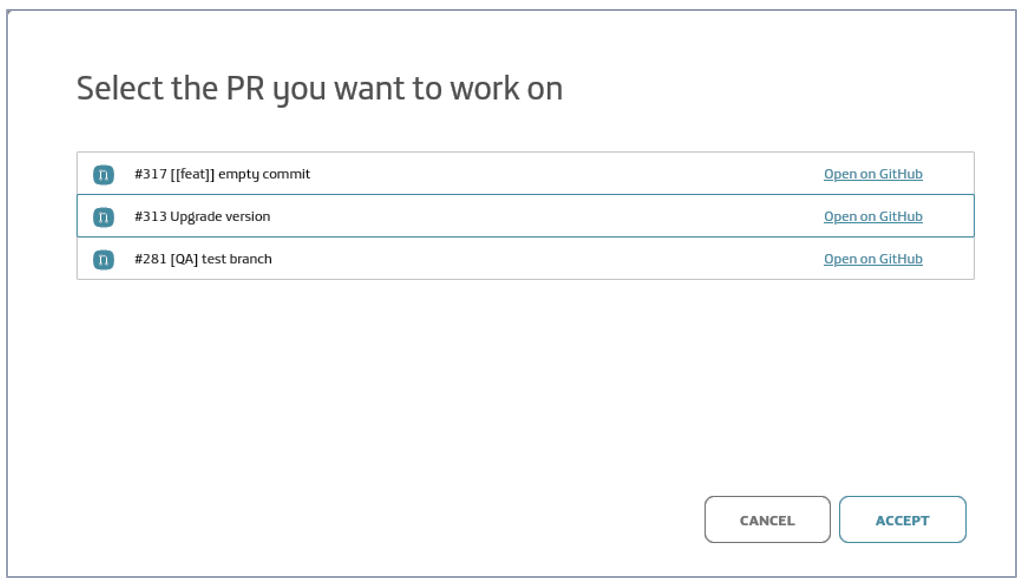
-
Now, you can work over it as explained in Create a new Pull Request section, from step 2 onwards.
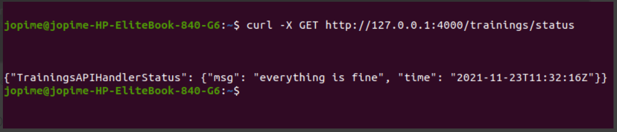
When Abacus is started, the API is available in:
http://127.0.0.1:4000 (*)
(*) The port is variable, with values in the range: 4000 - 4100
The API documentation is included in Aura NLP API definition.
Abacus troubleshooting
Logs files
All the operations carried out with Abacus are recorded in the logs file:
${Root_project}/server.log
-
If an error occurs, Abacus will show this message:
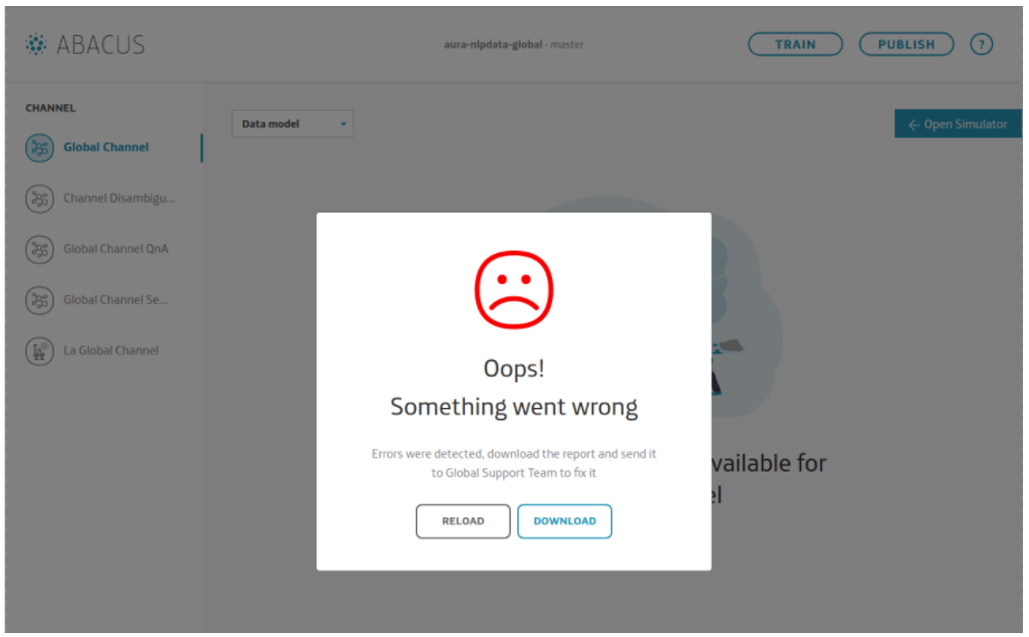
-
Clicking on “Download”, you can access to the log report and check the error for fixing it.
-
If, the problem persists, contact the Global Support Team and provide them with the report.
-
When it is solved, press “Reload”, to continue using Abacus.
Git conflicts
If the remote branch has changes that have not been updated in the local working branch, Github detects this situation as a conflict when publishing, and is not able to recognize which are the correct changes.
The following pop up will appear after clicking on “publish”.
Clicking on “Download”, you will get the file ${Root_project}/server.log, where you can check the errors that have occurred and try to solve them.
!  [rejected]    <<working-branch>>  ->  <<working-branch>> (fetch first)
error: failed to push some refs to 'git@github.com:Telefonica/aura-nlpdata-global.git'
Conflicts in server.log must be resolved locally using the editor:
-
Open a terminal in code editor. Make sure the branch in terminal is the correct working branch.
-
Move changes from the remote branch to local:
git pull origin <<working-branch>>

-
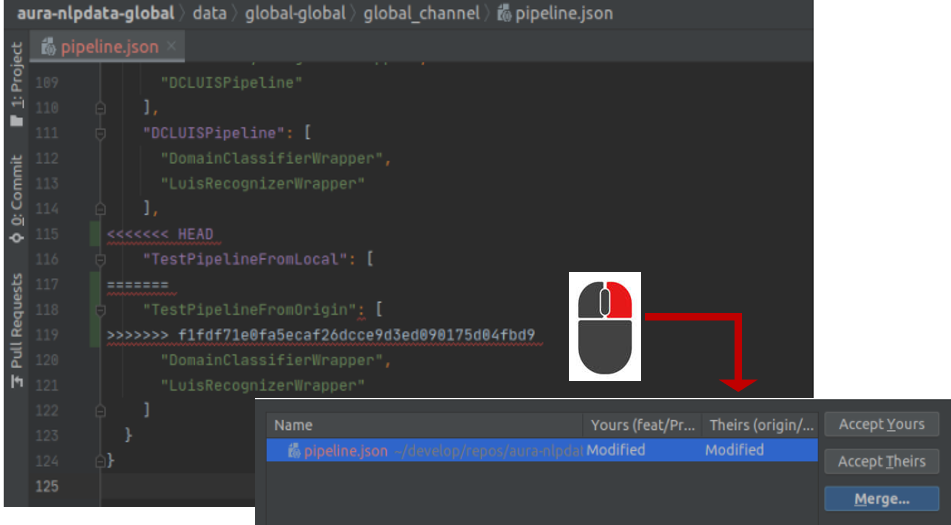
A message with a list of files with conflicts is shown.
-
Open each file and right-click to access the conflicts resolver.
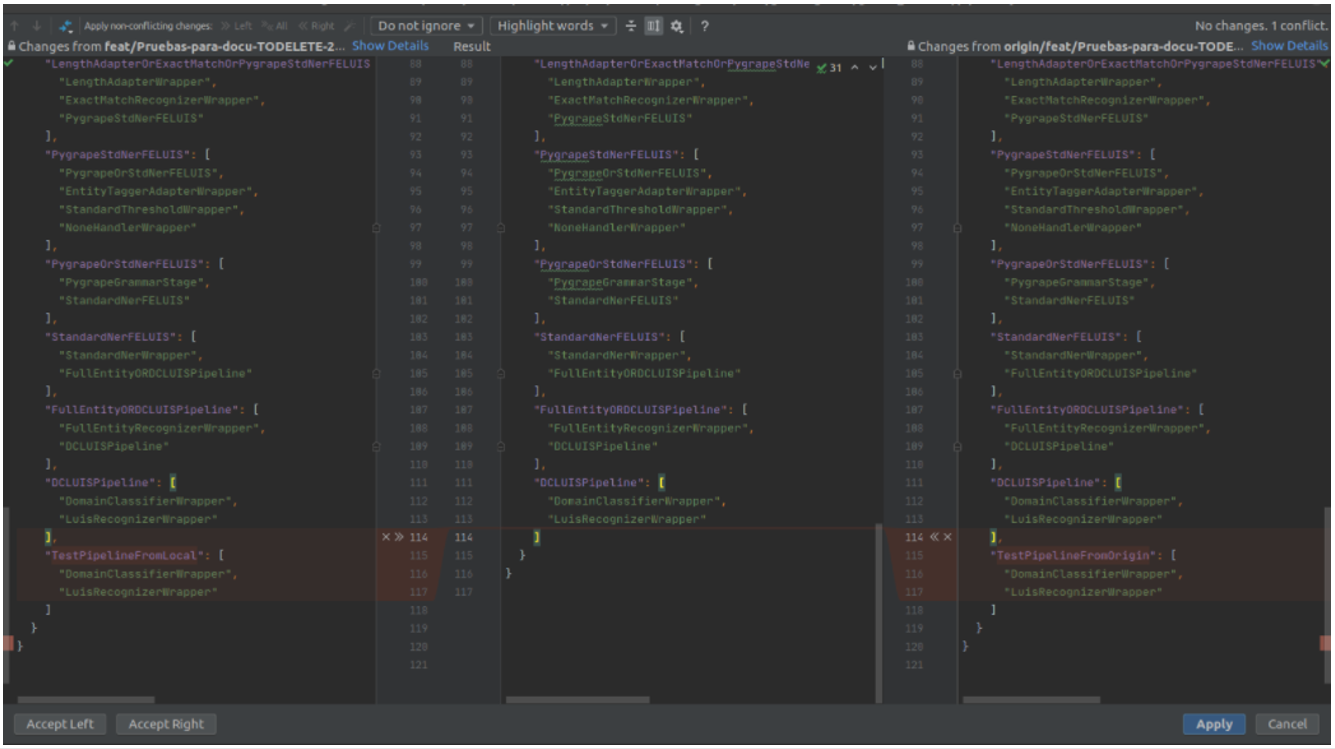
-
Resolve the conflict. You can include texts from the local branch (left) or from the remote one (right) or discard both and copy what is needed.
-
Once conflicts are resolved, launch the following command to review the status of the local branch and check that all the conflicts are fixed in the response message:
git status
-
When all the conflicts are resolved, commit changes:
git commit –m "[[feat]] resolve conflicts: <<description of changes>>"
-
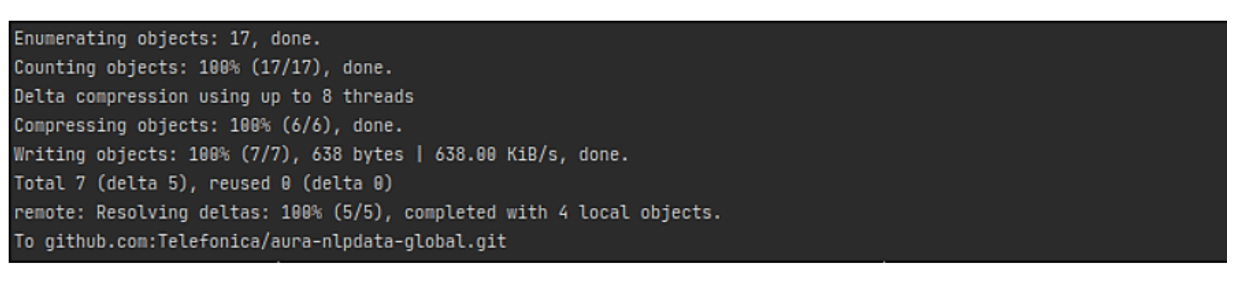
Push to update changes to the remote branch:
git push origin <<working-branch>>
-
A message with all the details will appear.
-
If everything is solved, now restart the web server and continue with the existing Pull Request.